In a world that’s increasingly focused on sustainability, upcycling has emerged as one of the most rewarding and eco-friendly ways to give old furniture a new lease on life. Upcycling transforms discarded, outdated, or worn-out pieces into stylish, functional furniture that reflects your personal taste—all while reducing waste and saving money. Whether you’ve stumbled upon a dusty dresser at a thrift store or are looking to breathe fresh life into a piece that’s been in the family for years, upcycling offers endless opportunities for creativity.
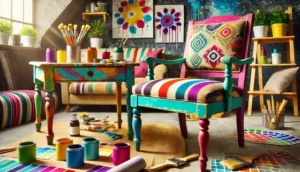
By using simple materials like paint and fabric, you can completely transform the look and feel of a piece of furniture. This DIY approach doesn’t just save you from buying costly new items, but it also allows you to create something entirely unique. From reupholstering a vintage chair with bold, modern fabric to revitalizing an old table with a fresh coat of paint, upcycling combines craftsmanship with artistry, making it an incredibly fulfilling process.
In this guide, we’ll walk you through every step of upcycling your old furniture—from preparing and painting to choosing the perfect fabric for reupholstery. Whether you’re an experienced DIY enthusiast or just getting started, this comprehensive guide will inspire you to turn old, forgotten furniture into stunning, one-of-a-kind pieces that not only enhance your living space but also contribute to a more sustainable future. So, let’s get started on your next upcycling project and unleash your inner designer!
Why Upcycle Old Furniture?
Upcycling old furniture has become more than just a home improvement trend; it’s a creative movement that resonates with people looking to make a positive impact on the environment and their wallets. Whether it’s a vintage dresser, an old wooden chair, or a forgotten coffee table, the process of transforming something old into something new is both fulfilling and stylish. But why should you consider upcycling rather than tossing your worn-out furniture to the curb or donating it? In this section, we’ll dive into the environmental, financial, and creative reasons that make upcycling an exciting and meaningful endeavor.
Environmental Benefits
The environmental benefits of upcycling old furniture are substantial. In a world where fast furniture—mass-produced, cheap furniture made from unsustainable materials—dominates the market, the result is a staggering amount of waste. According to the Environmental Protection Agency (EPA), Americans throw away over 12 million tons of furniture and furnishings every year, much of which ends up in landfills. Upcycling, on the other hand, helps reduce this waste by extending the life of furniture that would otherwise be discarded.
When you upcycle, you’re not just reusing materials; you’re preventing the need for new resources. Manufacturing new furniture requires raw materials, energy, and water. For example, the production of a single new wooden chair can involve cutting down trees, processing the wood, and transporting it to factories. By reusing and repurposing old furniture, you cut down on the demand for these resources, reducing your carbon footprint. Moreover, upcycling often involves using environmentally friendly paints and finishes, which can further reduce harmful emissions compared to the toxic chemicals used in many factory-made furniture pieces.
Cost Savings Compared to Buying New Furniture
If you’ve ever browsed for new furniture, you know how expensive it can be. From $1,000 sofas to $500 coffee tables, decorating your home with brand-new items can quickly become an expensive endeavor. Upcycling allows you to achieve a designer look without the hefty price tag. Instead of spending hundreds or even thousands on new pieces, you can often find old furniture at thrift stores, yard sales, or even on the curb for a fraction of the cost—or for free.
Not only is upcycling budget-friendly, but it also allows you to customize pieces to your liking, something that often comes with a high cost in the retail market. Want a teal dresser with gold hardware? Or maybe a mid-century modern chair with floral upholstery? These personalized touches can be incredibly expensive when you purchase them new. However, by upcycling, you can recreate these designer looks at a fraction of the price.
Creative and Personalization Opportunities
Beyond the environmental and financial benefits, upcycling offers something you can’t buy off the shelf: a unique, creative outlet. When you upcycle old furniture, you can customize it to fit your personal style and home décor, making each piece one-of-a-kind. Whether you prefer rustic, vintage, minimalist, or modern aesthetics, you have full creative control over the look and feel of your upcycled piece.
For many people, the act of upcycling is a form of self-expression. It allows you to take something that may have been discarded and turn it into a statement piece that reflects your personal taste. The process is inherently artistic, from choosing the right paint color to selecting complementary fabrics for reupholstery. You can experiment with bold patterns, bright colors, and unconventional materials to create furniture that is not only functional but also a conversation starter.
Sense of Achievement
One of the less tangible but incredibly fulfilling benefits of upcycling is the sense of achievement it brings. There’s something deeply satisfying about transforming a piece of furniture that’s seen better days into a restored or reimagined masterpiece. Upcycling allows you to bring new life to old items, and watching your project evolve from a rundown chair to a beautifully reupholstered statement piece is immensely rewarding.
Additionally, upcycling can be a shared experience. Whether you’re tackling a project with a friend or family member, or teaching your children how to sand and paint, upcycling can foster collaboration and creativity. Many people find that upcycling strengthens their connection to the items in their home because they’ve invested time, effort, and imagination into their creation.
Choosing the Right Furniture to Upcycle
Before you begin your upcycling journey, the first step is selecting the right piece of furniture. Not every piece is a good candidate for upcycling, and choosing wisely will ensure your project’s success. In this section, we’ll explore what to look for in potential furniture projects, as well as the types of furniture that are ideal for upcycling.
What to Look for in Old Furniture
When selecting furniture to upcycle, it’s essential to evaluate the condition of the piece. While a new coat of paint or fabric can work wonders, some pieces may require structural repairs that go beyond cosmetic fixes. Look for furniture with good bones—meaning solid, sturdy frames made from durable materials. Avoid pieces with significant water damage, rot, or irreparable wear and tear.
Wooden furniture, in particular, is a great choice for upcycling. Solid wood pieces are typically more durable and easier to refinish compared to veneer or particleboard, which may warp or chip over time. However, even items made of particleboard or MDF (medium-density fiberboard) can be upcycled with the right techniques and care. Be sure to check for any structural damage such as loose joints or missing screws, as these issues can often be repaired but may require extra effort.
Types of Furniture Ideal for Upcycling
Certain types of furniture lend themselves particularly well to upcycling. Wooden chairs, for example, are one of the most popular pieces to transform. They’re often easy to find at thrift stores and can be sanded, painted, and reupholstered with minimal effort. Dressers, side tables, and coffee tables are also great candidates for upcycling, as they offer a blank canvas for creative redesign.
If you’re new to upcycling, consider starting with a small piece of furniture such as a chair or end table. These projects are manageable and provide a great introduction to basic upcycling techniques like sanding, painting, and fabric application. Once you’ve mastered these skills, you can move on to larger, more complex projects like dining room sets or bed frames.
In addition to wooden furniture, don’t overlook metal or upholstered pieces. Metal furniture, such as vintage steel chairs or iron bed frames, can be revitalized with fresh paint or powder coating. Upholstered items, like armchairs or ottomans, can be transformed with new fabric and cushioning, offering both comfort and style.
By carefully selecting the right furniture and understanding the unique benefits of upcycling, you’re setting yourself up for success. Upcycling isn’t just a way to refresh old furniture—it’s a creative, cost-effective, and environmentally friendly way to make your home truly your own.
How to Prepare Furniture for Upcycling
Once you’ve chosen the perfect piece of furniture to upcycle, the real fun begins: transforming it into something new and beautiful. However, before you dive straight into painting or reupholstering, proper preparation is key to achieving professional-looking results. This section will guide you through the essential steps of cleaning, repairing, sanding, and priming your furniture to ensure a flawless finish.
Cleaning and Repairing Furniture
Before anything else, it’s important to thoroughly clean the furniture you’re about to upcycle. Even if a piece looks relatively clean, it may have accumulated dust, dirt, oils, or even old varnish that could affect the final outcome of your work. Start by wiping down the entire surface with a damp cloth or sponge. For tougher grime or grease, use a gentle soap or detergent mixed with warm water. Make sure to get into all the crevices and corners, as dust can often build up in hard-to-reach areas.
If you’re dealing with wooden furniture, be cautious when using water, as too much moisture can warp the wood. In this case, using a cleaner specifically designed for wood, such as a mild wood cleaner or vinegar solution, can be more effective.
Once your piece is clean, the next step is to assess whether any repairs are needed. Common issues include loose joints, wobbly legs, or missing hardware. Most of these problems can be fixed with simple tools: tighten loose screws, apply wood glue to reinforce joints, and replace any missing hardware such as drawer pulls or knobs. If there are dents or scratches, you can fill them with wood filler and sand them smooth before moving on to the next step.
Sanding and Priming for a Smooth Finish
Sanding is one of the most crucial steps in preparing furniture for upcycling, especially if you’re working with wood. Sanding removes any old finishes, varnishes, or imperfections, creating a smooth, even surface for paint or stain to adhere to. Depending on the condition of the furniture, you may need to start with coarse-grit sandpaper (around 80-120 grit) to remove rough areas or old layers of paint. After that, switch to a finer grit (220-320) to smooth out the surface.
Use a sanding block or an electric sander for flat surfaces and be sure to go with the grain of the wood to avoid scratches. For corners and detailed areas, hand-sanding with fine-grit paper will help you reach those intricate spots. Once you’re done sanding, wipe down the piece with a damp cloth or tack cloth to remove any dust.
After sanding, priming the furniture is highly recommended, especially if you’re planning to use a lighter color of paint or if the wood has a stain that might bleed through the paint. A good primer will seal the surface, help the paint adhere better, and prevent imperfections from showing through the finished product. Apply one or two thin coats of primer with a brush or roller, making sure to let each coat dry fully before proceeding to the next step.
Choosing the Best Paint for Furniture Upcycling
When it comes to upcycling furniture, choosing the right type of paint can make all the difference. With so many options available, selecting the perfect paint might seem overwhelming, but it’s important to match the paint type to the material and the desired finish of your project. This section will break down the most popular types of paint for furniture upcycling and how to apply them for the best results.
Types of Paint to Use
- Chalk Paint Chalk paint has become one of the most popular choices for furniture upcycling, and for good reason. Its matte, velvety finish gives furniture a rustic, shabby-chic look, making it a favorite for vintage or farmhouse-style pieces. The best part? Chalk paint requires minimal preparation—often no sanding or priming is needed unless the surface is particularly glossy or damaged. It’s also versatile and forgiving, meaning you can easily distress it with sandpaper for a weathered look.
- Milk Paint Milk paint, another eco-friendly option, has been around for centuries and gives furniture a soft, vintage appearance. Like chalk paint, it can be used to create a distressed or aged look, but it’s thinner and tends to soak into wood surfaces, enhancing the natural grain. Milk paint is great for creating an antique feel, and it’s non-toxic, making it a popular choice for eco-conscious upcyclers.
- Latex Paint If you’re looking for a broader range of colors, latex paint is a versatile and readily available option. It provides a durable finish and works well for pieces that need to stand up to wear and tear, like dining tables or chairs. Latex paint offers a smooth, modern finish, but unlike chalk or milk paint, it typically requires sanding and priming to achieve the best results.
- Oil-Based Paint Oil-based paints are known for their durability and are often used on high-traffic furniture like cabinets or tabletops. They provide a smooth, glossy finish that resists chipping, but oil-based paints do take longer to dry and have a stronger odor compared to other paints. Proper ventilation and patience are key when working with oil-based paint.
How to Apply Paint for Best Results
Regardless of the type of paint you choose, applying it properly is crucial for a professional-looking finish. Here are some tips to ensure your paint job turns out smooth and flawless:
- Use High-Quality Brushes and Rollers: Cheap brushes can leave streaks or bristles in the paint, while high-quality brushes ensure a smoother, more even application. For large, flat surfaces, a foam roller can help you apply the paint evenly without visible brush strokes.
- Thin, Even Coats: It’s tempting to apply thick coats of paint to speed up the process, but this often leads to drips, streaks, and uneven texture. Instead, apply multiple thin coats, allowing each one to dry fully before adding the next. This ensures a smoother, more durable finish.
- Don’t Forget to Sand Between Coats: For an ultra-smooth finish, lightly sand between coats with fine-grit sandpaper (320-400 grit). This helps eliminate any bumps or imperfections, ensuring the final coat looks flawless.
How to Upcycle Furniture with Fabric
While paint can drastically transform the appearance of old furniture, adding fabric—whether through reupholstery or decorative accents—can take your upcycling project to the next level. Upholstering or re-covering old chairs, benches, or ottomans not only refreshes the look of your furniture but also makes it more comfortable and inviting. In this section, we’ll walk through the basics of upcycling furniture with fabric and how to achieve a professional finish.
Types of Fabric for Furniture Upcycling
Choosing the right fabric is essential to the success of your project. Here are a few common types of fabric used for furniture upcycling:
- Upholstery Fabric: Heavy-duty upholstery fabric is designed for durability and can withstand daily wear and tear. It’s ideal for reupholstering chairs, sofas, and benches. Upholstery fabrics come in a wide range of patterns and textures, allowing you to customize your furniture to match your style.
- Canvas: Canvas is a strong, durable fabric that’s often used for outdoor furniture or casual, rustic interiors. It’s easy to work with and can be painted or stenciled for a custom look.
- Cotton and Linen: These natural fabrics are breathable and soft, making them a popular choice for lighter furniture like dining chairs or ottomans. However, they may require additional padding or backing for durability.
By carefully preparing your furniture, selecting the right paint, and incorporating fabric elements, you can turn any old, tired piece of furniture into a stunning, personalized statement piece that will bring both function and beauty to your home.
Creative Ideas for Upcycling with Paint and Fabric
Upcycling old furniture is more than just a way to extend the life of a piece; it’s an opportunity to showcase your creativity. With the right combination of paint and fabric, you can transform even the most ordinary furniture into something extraordinary. Whether you’re aiming for a bold, eye-catching statement piece or a subtle, chic upgrade, the possibilities are endless. In this section, we’ll explore a range of creative ideas that can inspire you to take your furniture upcycling projects to the next level.
Bold Colors and Patterns
One of the most exciting aspects of upcycling furniture is the freedom to experiment with bold colors and patterns. Unlike mass-produced furniture, which tends to stick to neutral tones and safe designs, upcycling allows you to infuse your personality into every piece. Bright, bold colors can turn an otherwise plain dresser or chair into the focal point of a room.
Color Blocking
Color blocking is a popular trend where large blocks of contrasting colors are applied to different parts of a piece of furniture. For example, you could paint the drawers of a dresser in varying shades of blue or yellow, while keeping the frame a neutral color. This technique works particularly well with mid-century modern furniture, as its clean lines complement bold color schemes.
Pattern Mixing
For an even more daring look, consider combining different patterns. A reupholstered armchair, for example, might feature a bold floral pattern on the seat cushion and a contrasting geometric print on the backrest. When mixing patterns, it’s important to balance the scale of the designs—pair a large, vibrant print with a smaller, more subtle one to create visual harmony without overwhelming the eye.
Mixing Vintage and Modern Styles
Upcycling furniture also allows you to blend different design aesthetics, mixing vintage charm with modern sophistication. If you have an old piece that feels dated, consider giving it a contemporary update with sleek, minimalist paint finishes and modern fabrics. Conversely, a modern chair can be given a vintage twist with distressed paint and antique-style upholstery.
Distressing and Antique Finishes
Distressing techniques are perfect for achieving that weathered, vintage look. Using sandpaper, you can lightly sand down areas of painted furniture to reveal the wood underneath, creating an aged, rustic effect. This technique works beautifully on pieces like bookshelves, coffee tables, and cabinets, giving them an old-world charm.
Modern Updates
To give an old piece a modern update, choose sleek finishes like gloss or satin paints in neutral or metallic shades. Reupholster chairs or sofas with monochromatic fabrics or sleek leather for a minimalist look. This combination of old and new can bring a unique, timeless quality to your home.
Personalized Touches
Upcycling is a deeply personal process, and adding customized details can make your furniture even more special. Simple additions like stenciling, decoupage, or hand-painted designs can turn an otherwise standard piece of furniture into a true work of art.
Stenciling
Stenciling allows you to create intricate patterns and designs without having to be an expert painter. From Moroccan-inspired tiles to floral motifs, stencils can add a layer of texture and interest to plain furniture. You can stencil an entire surface, like a tabletop, or use it to highlight smaller areas, like the sides of a drawer or the legs of a chair.
Decoupage
For those who want to add even more personality, decoupage is a fantastic option. This technique involves adhering paper cutouts—such as wallpaper, magazine clippings, or custom prints—to the surface of the furniture, then sealing it with layers of varnish. Decoupage works particularly well on tabletops, drawer fronts, and cabinet doors, giving the piece a completely unique, decorative finish.
Tools and Materials You’ll Need
To successfully upcycle old furniture, it’s essential to have the right tools and materials at your disposal. A well-stocked toolkit ensures that your project will go smoothly, and having quality supplies will result in a more professional finish. In this section, we’ll cover the must-have tools for any upcycling project and where you can find the best materials.
Essential Upcycling Tools
- Sanding Tools
- Sandpaper: Different grits of sandpaper are essential for smoothing out surfaces. Coarse sandpaper (80-120 grit) is great for initial sanding, while fine sandpaper (220-320 grit) is perfect for finishing.
- Electric Sander: If you’re working on large or flat surfaces, an electric sander will save you a lot of time and effort.
- Paintbrushes and Rollers
- High-Quality Brushes: For detailed work, invest in high-quality brushes. Cheap brushes tend to shed bristles and leave streaks.
- Foam Rollers: These are ideal for achieving smooth, even coats of paint on larger surfaces.
- Staple Gun
- Manual or Electric Staple Gun: Essential for reupholstery projects, a staple gun will help you secure fabric to furniture quickly and easily.
- Measuring Tape and Scissors
- Always have a measuring tape on hand for ensuring accurate fabric cuts or determining the correct size for stencils and patterns.
- Fabric Scissors: Sharp, high-quality fabric scissors are a must when cutting upholstery or fabric for your project.
- Screwdriver and Hammer
- Basic Tools for Repairs: A screwdriver and hammer will come in handy for removing hardware, reassembling pieces, or fixing any loose joints.
- Wood Filler and Putty Knife
- For repairing small dents, scratches, or holes in wooden furniture, wood filler and a putty knife are essential. After filling imperfections, smooth them out with sandpaper for a seamless look.
Where to Buy Supplies
- Hardware Stores: Local hardware stores like Home Depot or Lowe’s are great for picking up essential tools, wood filler, paint, and sandpaper. You’ll also find a variety of brushes and rollers for your painting projects.
- Fabric Stores: For reupholstery projects, check out fabric stores like Joann Fabrics or specialty upholstery shops for high-quality fabric options. Many stores offer a wide selection of patterns, materials, and textures to suit any style.
- Online Retailers: Websites like Amazon and Etsy offer a range of upcycling tools and materials, including stencils, decoupage supplies, and unique hardware. Etsy is also an excellent resource for finding custom or vintage-inspired fabrics and paints.
Tips for Beginners in Furniture Upcycling
Starting your first upcycling project can feel overwhelming, especially if you’re new to DIY furniture transformations. However, with the right approach and mindset, you can achieve stunning results—even as a beginner. In this section, we’ll share practical tips to help you avoid common mistakes and guide you toward success.
Common Mistakes to Avoid
- Skipping Preparation One of the biggest mistakes beginners make is skipping the preparation stage. Skipping sanding or priming might save time in the short term, but it will lead to poor paint adhesion and a less durable finish. Take the time to clean, sand, and prime your furniture before painting to ensure a smooth, long-lasting result.
- Using the Wrong Paint Another common error is choosing the wrong type of paint for the project. For example, latex paint may not work well on an unprimed surface, while chalk paint might not provide the desired finish for certain modern styles. Make sure to research and select the right paint for your project’s material and desired aesthetic.
- Rushing the Process Patience is key in furniture upcycling. Many beginners rush through sanding, priming, or drying times, which can lead to uneven results or chipping paint. Always allow sufficient time between coats of paint and follow the manufacturer’s instructions regarding drying times.
How to Start with Simple Projects
If you’re new to upcycling, it’s wise to start with a simple project before moving on to more complex pieces. Here are a few beginner-friendly ideas to help you get started:
- Small Side Tables or Stools: These are great starter projects as they often require minimal sanding, painting, or fabric work.
- Wooden Chairs: With a basic wooden chair, you can practice sanding, painting, and reupholstering without overwhelming yourself.
- Picture Frames or Mirrors: If you want to start even smaller, upcycling an old picture frame or mirror with a fresh coat of paint or some added embellishments can give you a feel for the process without taking up too much time or space.
By avoiding common mistakes and starting with simpler projects, you’ll build the skills and confidence needed to tackle more ambitious furniture upcycling endeavors.
With the right tools, materials, and creative inspiration, upcycling furniture can be a rewarding and enjoyable experience. Whether you’re a seasoned DIY enthusiast or a complete beginner, these steps will guide you toward creating beautiful, personalized pieces that reflect your unique style while reducing waste and saving money.
Showcasing Your Upcycled Furniture
Once you’ve completed your furniture upcycling project, it’s time to showcase your hard work and creativity. Whether you’re transforming your home with one-of-a-kind pieces or preparing to sell your upcycled items, how you display and present your furniture is just as important as the upcycling process itself. In this section, we’ll cover the best ways to stage your furniture in your home, how to photograph it for online or social media purposes, and even tips for turning your hobby into a business by selling your upcycled creations.
Displaying Your Work at Home
After you’ve upcycled a piece of furniture, it deserves a spot in your home where it can truly shine. The right placement and décor can enhance the overall look of your creation and make it feel like a cohesive part of your interior design.
Consider the Room’s Aesthetic
Before deciding where to place your newly upcycled piece, think about the room’s existing décor and color scheme. A bold, brightly painted chair or dresser can serve as a focal point in a neutral room, while a more subtle upcycled piece may complement other colorful items. If your upcycled piece has a vintage or rustic finish, pairing it with similarly styled accessories—like antique mirrors or distressed picture frames—can help it blend seamlessly into the room.
Use Lighting to Highlight the Piece
Good lighting can make all the difference in how your furniture looks. Place your upcycled furniture near natural light sources, such as windows, or use well-placed lamps to highlight the piece. Lighting can bring out the details of your painting, distressing, or fabric work, making the piece feel more prominent and inviting.
Layer with Textiles and Accessories
Adding complementary textiles and accessories to your furniture can create a more cohesive look. For example, a reupholstered chair can be paired with a cozy throw blanket or decorative cushions. A newly painted dresser might benefit from some well-placed picture frames, vases, or books on top. These finishing touches help integrate your upcycled piece into the overall aesthetic of the room.
How to Photograph Your Upcycled Furniture
Whether you’re sharing your creations on social media, building a portfolio, or selling your furniture online, taking high-quality photos is essential. Good photography can highlight your craftsmanship and attract more attention to your work. Here are some tips for photographing your upcycled furniture effectively.
Use Natural Light
Whenever possible, take photos during the day using natural light. Avoid using the camera’s flash, as it can create harsh shadows and alter the true colors of your piece. Position your furniture near a large window or an area with soft, diffused light for the best results.
Choose a Simple Background
Your furniture should be the star of the photo, so opt for a simple, uncluttered background. A plain wall or neutral backdrop works best, as it won’t distract from the details of your piece. Make sure to clear away any unnecessary items from the surrounding area to keep the focus solely on the furniture.
Capture Multiple Angles
Showcasing your furniture from multiple angles helps potential buyers or viewers get a better sense of the piece’s overall design. Be sure to photograph the front, back, sides, and any special details or embellishments you’ve added. If you’ve reupholstered or used fabric, zoom in on the stitching or fabric patterns to highlight the quality of your work.
Edit for Clarity and Brightness
You don’t need to be a professional photographer to take great photos of your furniture. However, simple photo editing can go a long way in improving the clarity, brightness, and overall appeal of your images. Many free or low-cost editing apps allow you to adjust the lighting, contrast, and sharpness of your photos with ease.
Selling Your Upcycled Furniture
For many people, upcycling begins as a hobby but can quickly evolve into a profitable business. If you’re interested in selling your upcycled furniture, there are several platforms and strategies you can use to reach potential buyers. In this section, we’ll discuss how to price your work, where to sell it, and tips for growing your upcycling business.
Pricing Your Upcycled Furniture
Determining the right price for your upcycled furniture can be challenging, but there are a few factors to consider when setting your prices.
- Cost of Materials Start by calculating the cost of all the materials you used, including paint, fabric, tools, and hardware. Make sure to factor in any additional costs, such as transportation or repairs.
- Time and Labor Don’t forget to account for the time and effort you put into the project. Think about how long it took to sand, paint, upholster, and finish the piece. While you might not charge a full hourly rate as a professional would, your time and skill should still be reflected in the price.
- Market Value Research similar upcycled pieces online or at local furniture stores to get a sense of what others are charging for comparable items. Pricing your work competitively will help attract buyers while ensuring you receive fair compensation for your craftsmanship.
Best Platforms to Sell Your Furniture
Once you’ve priced your furniture, it’s time to decide where to sell it. There are a variety of online and offline options to consider.
Online Marketplaces
- Etsy: Etsy is a popular platform for selling handmade and upcycled goods. With a global audience and a focus on unique, artisan items, Etsy is an excellent choice for upcycled furniture.
- eBay: eBay allows you to reach a broad audience of buyers, and you can choose between auction-style listings or fixed-price listings.
- Facebook Marketplace: This platform is ideal for selling furniture locally. You can post your items, set a price, and communicate directly with buyers in your area. It’s a great option if you want to avoid shipping costs.
- Chairish: Chairish specializes in vintage and upcycled furniture, making it a perfect platform for selling higher-end or uniquely designed pieces.
Local Markets and Shops
- Flea Markets and Craft Fairs: If you prefer to sell in person, consider setting up a booth at a local flea market or craft fair. These venues are perfect for connecting with buyers who appreciate one-of-a-kind, handmade items.
- Consignment Shops: Many local consignment shops will sell your upcycled furniture in exchange for a percentage of the final sale price. This can be a good option if you want to sell locally but don’t have the space or time to manage a storefront.
Growing Your Upcycling Business
If you’re serious about turning your upcycling hobby into a business, there are a few key steps you can take to grow your brand and attract more customers.
- Build a Strong Online Presence Social media platforms like Instagram and Pinterest are excellent for showcasing your work and building a following. Post high-quality photos of your furniture, share behind-the-scenes shots of your process, and engage with your audience to create a community around your brand.
- Offer Custom Work As your business grows, you may start receiving requests for custom furniture pieces. Offering custom upcycling services allows you to cater to specific tastes and styles, which can set you apart from other sellers.
- Collaborate with Other Creatives Partnering with local artists, interior designers, or other upcyclers can help expand your reach and introduce your work to new audiences. Consider collaborating on joint projects or hosting pop-up shops together.
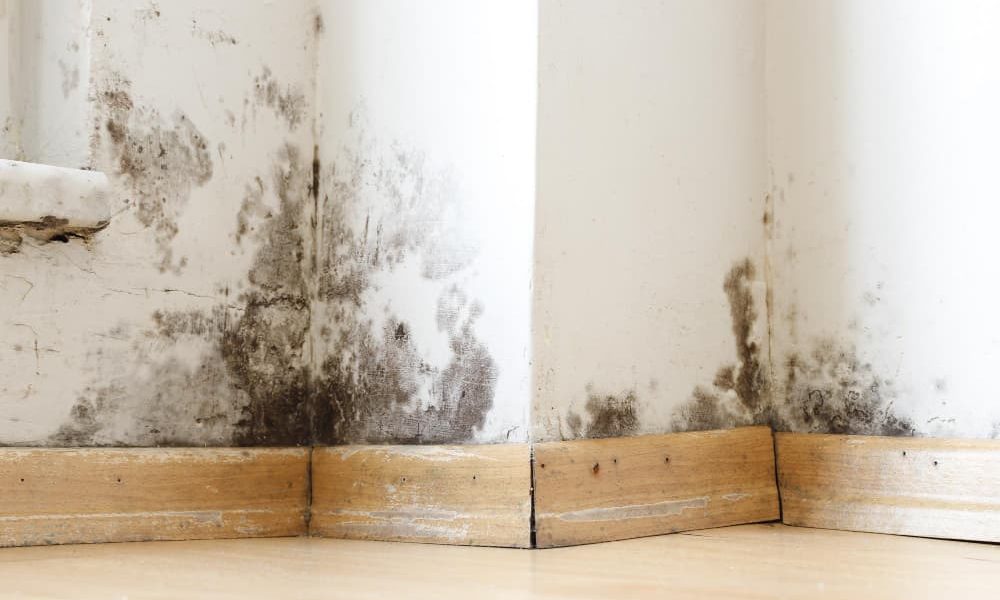
Knowing how to eliminate moisture that rises from the ground is not easy: today we will provide you with Read more

Discover how to care for an orchid with our expert guide, covering everything from proper lighting to disease prevention. Read more

If you have run out of ideas, but you want to know how to decorate a Christmas tree with tinsel, Read more
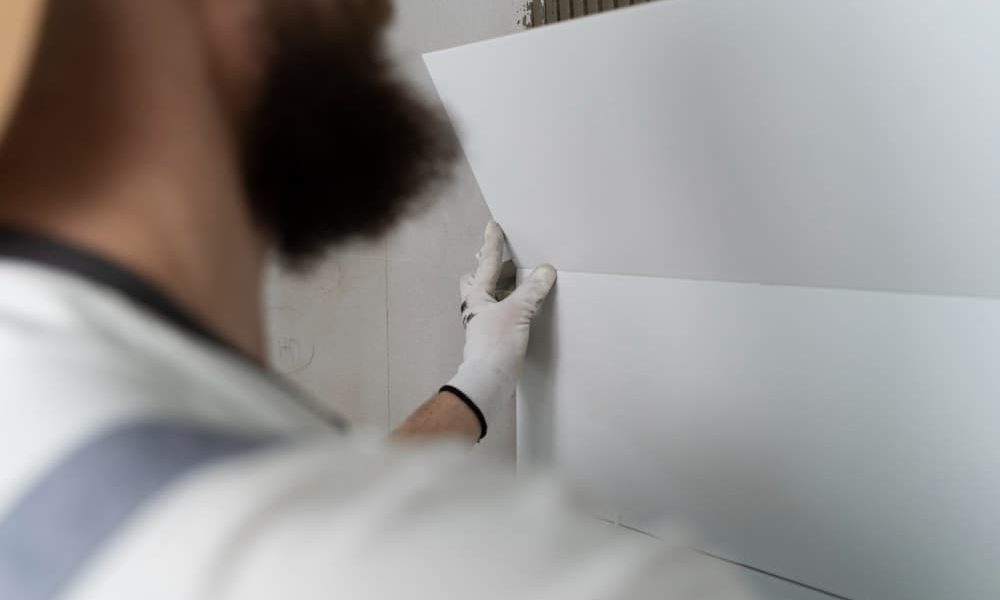
If you are interested in learning how to safely install anti-humidity plates on your own, saving time and money, don't Read more
Conclusion: The Reward of Upcycling
Upcycling furniture is more than just a way to repurpose old items; it’s a creative, environmentally friendly practice that allows you to express your personal style while contributing to sustainability. Whether you’re transforming your home with unique, handcrafted pieces or selling your creations to others, the rewards of upcycling are plentiful. Not only can you save money and reduce waste, but you can also take pride in the beauty and functionality of the items you’ve transformed.
By following the steps outlined in this guide, you can confidently take on your next furniture upcycling project—whether you’re a beginner or an experienced DIY enthusiast. From choosing the right piece of furniture to preparing, painting, and upholstering it, each stage of the process offers an opportunity to learn, grow, and create something truly special.
So, why not get started today? That old dresser or chair in the corner of your garage might just be waiting for a second life, and with a little creativity and effort, it can become a stunning addition to your home or a sought-after piece for others to enjoy.


