In an era where sustainability is becoming more important than ever, many of us are looking for ways to reduce our environmental footprint. Home decor is no exception. Creating a DIY chandelier from recycled glass bottles is a perfect blend of creativity, functionality, and eco-consciousness. This project not only allows you to express your personal style but also contributes to reducing waste, making it an ideal choice for anyone passionate about upcycling and sustainable living.
One of the most compelling reasons to opt for a DIY chandelier made from recycled glass bottles is the environmental impact. According to the Glass Packaging Institute, only about 33% of glass in the United States gets recycled. That leaves a significant amount of glass that ends up in landfills, where it can take up to a million years to decompose. By reusing glass bottles, you’re not just preventing them from adding to the growing waste problem, but also giving them a new purpose in a creative and functional way.
Aside from being an eco-friendly project, this DIY endeavor offers a unique opportunity to create a lighting fixture that is truly one-of-a-kind. Store-bought chandeliers can be expensive, and often, they lack the personal touch that makes your space feel uniquely yours. When you make your own chandelier, especially from recycled materials, you have complete control over the design, color palette, and overall aesthetic. Whether you’re aiming for a rustic vibe with green wine bottles or a sleek, modern look with clear bottles, the end result is a striking piece that reflects your personality.
Additionally, making your own chandelier can be a satisfying challenge. It combines crafting skills with basic electrical knowledge, and the result is not just a beautiful piece of home decor but also a sense of accomplishment. Whether you’re a seasoned DIY enthusiast or a beginner looking to start small, a glass bottle chandelier is a project that is both manageable and rewarding.
So, why should you make a chandelier from recycled glass bottles? It’s simple—because you’re turning waste into beauty, and that’s the ultimate goal of sustainable living. You can reduce your environmental impact, save money, and create something that is uniquely yours.
Materials You’ll Need to Create a Recycled Glass Bottle Chandelier
Now that you’re inspired to start this project, let’s talk about the materials you’ll need. Like any DIY project, preparation is key. Ensuring that you have the right tools and materials before you begin will make the process smoother and more enjoyable. Plus, gathering the materials is half the fun—especially when you’re repurposing items that might have otherwise been thrown away.
- Glass Bottles
The most obvious material is glass bottles. You’ll need to decide how many bottles to use, which largely depends on the size and style of the chandelier you’re envisioning. For a larger, more dramatic chandelier, you might want to collect 8 to 10 bottles. For a smaller, minimalist design, 3 to 5 bottles could suffice.
When selecting bottles, consider the shape, color, and transparency. Wine bottles, beer bottles, and even soda bottles all bring different aesthetics. Clear glass bottles give a more neutral look and allow for brighter lighting, while colored glass bottles can add mood and atmosphere to a room. Green, blue, amber, and frosted glass can create a distinct lighting effect, perfect for setting the tone in a dining room or outdoor space.
If you don’t already have a collection of glass bottles at home, start saving them from your own drinks or ask friends and family to contribute. Alternatively, thrift stores and recycling centers are excellent places to find unique bottles at a low cost.
- Bottle Cutter
To turn your bottles into a functional chandelier, you’ll need to cut them. This is where a bottle cutter comes into play. Bottle cutters are specifically designed to score glass bottles, allowing you to break them in a controlled way. Some bottle cutters come with adjustable settings, which makes it easier to cut bottles of different sizes.
If you’ve never cut glass before, it’s important to practice on a few test bottles first. Scoring the bottle evenly is essential for creating a clean break. After scoring the bottle, applying alternating hot and cold water helps the glass break along the score line. Make sure to sand down the edges after cutting to prevent sharp or jagged areas from causing injury later on.
- Lighting Kit
Next, you’ll need a lighting kit. This includes light bulbs, sockets, wires, and any other electrical components needed to turn your chandelier into a functional lighting fixture. For this project, pendant lighting kits work particularly well, as they are designed to hang from the ceiling and can support the weight of the bottles.
LED bulbs are a great choice for this project, as they are energy-efficient and long-lasting. They also don’t emit much heat, which is safer when using glass bottles. Depending on the design of your chandelier, you might want to use a single light source for each bottle or opt for a central light with the bottles acting as decorative shades.
- Ceiling Fixture and Mounting Materials
To hang your chandelier, you’ll need a ceiling fixture and some basic mounting materials. A wooden or metal frame can serve as a base for the bottles, or you can attach them directly to the ceiling fixture. Ensure that the fixture is sturdy enough to support the weight of the bottles and wiring.
- Decorative Elements
While the bottles themselves will be the centerpiece of your chandelier, you can add decorative elements to enhance the design. Twine, rope, metal chains, or even small pieces of driftwood can add a rustic charm, while chrome or brass accents lend a modern, industrial feel. The choice of materials will depend on the aesthetic you want to achieve.
- Tools
In addition to the materials, you’ll need a few basic tools to assemble your chandelier. These include pliers, wire cutters, a screwdriver, and a drill. If you’re unfamiliar with wiring, it might be helpful to have a voltage tester on hand to ensure that everything is properly connected.
By gathering these materials and tools, you’re ready to start building your unique and eco-friendly chandelier. In the next section, we’ll go through the process of preparing the bottles and assembling your chandelier step by step.
Preparing the Glass Bottles: Cutting and Cleaning
Once you’ve gathered your materials, it’s time to start preparing the glass bottles. This part of the process requires a bit of patience and attention to detail but will ensure that your chandelier looks professional and polished.
Step 1: Cutting the Bottles
Cutting glass bottles might sound daunting, but with the right tools and technique, it can be a safe and straightforward process. The key is using a bottle cutter, which is specifically designed to score the surface of the glass evenly. Here’s how to do it:
- Mark the Cutting Line – Decide where you want to cut the bottle. Most people prefer to cut near the bottom of the bottle to create a wider opening for the light bulb, but you can experiment with different cut points to achieve various looks.
- Position the Bottle – Place the bottle securely in the bottle cutter. Make sure it’s held firmly to ensure an even score as you rotate it. You want the cut line to be consistent around the entire circumference.
- Score the Bottle – Gently apply pressure as you rotate the bottle around the cutter. You should hear a scratching sound, indicating that the glass is being scored. Be careful not to press too hard—excessive pressure can cause the bottle to shatter unevenly.
- Hot and Cold Water Treatment – After scoring, alternate pouring hot and cold water over the score line. The temperature difference will cause the glass to expand and contract, making it break cleanly along the score.
- Smoothing the Edges – Once the bottle is cut, you’ll likely have rough, jagged edges. Sand these down with sandpaper or a glass smoothing tool to prevent any injuries. For a polished look, spend extra time on this step to ensure the edges are smooth.
Step 2: Cleaning the Bottles
Before assembling the chandelier, it’s crucial to thoroughly clean the bottles. Glass bottles, especially if they’ve been used to store liquids like wine or beer, can have residue and labels that need to be removed.
- Remove Labels – Soak the bottles in warm, soapy water for about 30 minutes to soften the adhesive on the labels. After soaking, use a sponge or scrubber to remove any labels. For stubborn glue residue, a mixture of baking soda and oil can work wonders.
- Clean the Interior – Use a bottle brush to clean the inside of the bottles thoroughly. Even if they appear clean, dust and residue can build up over time and affect the clarity of your light fixture.
- Dry Completely – Ensure the bottles are completely dry before moving on to the assembly phase. Any moisture left inside the bottles can create fogging when the chandelier is lit.
With your bottles cut and cleaned, you’re now ready to design and assemble your chandelier.
Designing Your Chandelier: Styles and Layouts
This is where your creativity can truly shine. The design of your chandelier will largely depend on the number of bottles you’ve cut, their size, and the overall aesthetic you’re aiming for. Whether you prefer a sleek, modern look or a more rustic, bohemian vibe, there are countless ways to arrange the bottles to create a unique lighting fixture.
Choosing a Style
When it comes to style, think about the space where you’ll be hanging the chandelier. Is it going to be the centerpiece in a dining room? A statement piece in the living room? Or perhaps a quirky addition to an outdoor patio? Here are some style ideas to inspire you:
- Rustic Farmhouse: For a rustic look, consider using green or amber bottles and pairing them with twine, rope, or reclaimed wood. You can group the bottles together in an uneven pattern to give it a more organic, less polished appearance. This style works well in kitchens, dining rooms, or outdoor spaces.
- Modern Industrial: For a modern or industrial vibe, use clear or frosted glass bottles and incorporate metal elements like black steel or brushed nickel. Hang the bottles in a uniform pattern for a sleek, clean look. This design fits perfectly in minimalist spaces or loft-style apartments.
- Bohemian Chic: To achieve a boho look, use colored glass bottles in a variety of hues. You can hang the bottles at different heights to create a playful, whimsical feel. Add some decorative tassels or beads to the cords for an extra layer of texture and style. This design is perfect for cozy living rooms or bedrooms.
Arranging the Bottles
Once you’ve chosen a style, it’s time to arrange the bottles. You can opt for a symmetrical design, where the bottles are hung evenly and at the same height, or go for an asymmetrical design, with bottles hanging at varying lengths. The way you arrange the bottles will influence the overall look and feel of the chandelier.
- Clustered Design: Grouping the bottles together in a tight cluster can create a bold, dramatic look. This design works well for larger chandeliers that will serve as the focal point of a room.
- Linear Design: Hanging the bottles in a straight line is a more structured, minimalist approach. This design is ideal for long dining tables or kitchen islands.
- Tiered Design: If you have multiple bottle sizes, you can create a tiered effect by hanging larger bottles lower and smaller ones higher up. This adds depth and visual interest to your chandelier.
Assembling the Chandelier: Wiring and Hanging
With your design finalized, it’s time to bring everything together. Assembling the chandelier involves wiring the lights and hanging the fixture securely. If you’re new to electrical work, it’s a good idea to consult with a professional or follow a trusted tutorial to ensure safety.
Step 1: Wiring the Lights
Start by installing the light sockets inside the bottles. Pendant light kits are ideal for this project because they come with pre-wired sockets that can be easily attached to the ceiling fixture. Follow these steps for safe and effective wiring:
- Insert the Light Sockets – Attach the light sockets to the opening of each glass bottle. Ensure that the wires are properly secured and that the socket fits snugly inside the bottle’s neck.
- Connect the Wires – Depending on the number of bottles you’re using, you’ll need to connect the wires either in parallel or series. Parallel wiring allows each bottle to have its own light bulb, whereas series wiring connects all the bulbs to a single light source. If you’re unsure about wiring, consider consulting a professional to ensure everything is done safely.
- Test the Wiring – Before final assembly, test the lights to ensure they’re working properly. Use a voltage tester to check the electrical connections and confirm that the bulbs are functioning.
Step 2: Hanging the Chandelier
Once the wiring is complete, it’s time to hang your chandelier. Ensure you have the appropriate mounting hardware for your ceiling type, whether it’s drywall, wood, or another material.
- Install the Ceiling Fixture – Secure the chandelier’s base or frame to the ceiling. Make sure it’s sturdy enough to support the weight of the bottles and lighting equipment.
- Hang the Bottles – Attach each bottle to the fixture according to your design. If you’re going for a tiered or staggered look, adjust the heights of the bottles as you hang them.
- Final Adjustments – Once the bottles are in place, step back and make any necessary adjustments. Ensure that the chandelier is level and that the bottles are hanging evenly (unless an uneven, artistic design is part of your plan).
Creative Variations: Using Colored Glass Bottles and LED Lights
While a classic glass bottle chandelier is stunning on its own, there are numerous ways to enhance its design by incorporating creative variations. This step gives you the chance to truly personalize your chandelier and make it stand out as a statement piece in your home.
Using Colored Glass Bottles
One way to add a dynamic and colorful touch to your chandelier is by using colored glass bottles. These bottles can dramatically change the mood of a room by casting vibrant shades of light. Here are a few ideas to get you started:
- Bright and Bold – Use bottles in bright hues like cobalt blue, emerald green, or ruby red to create a bold lighting statement. These colors can transform an ordinary space into a lively and engaging atmosphere, perfect for social areas like the dining room or living room.
- Soft and Subtle – For a more relaxed, subtle look, consider using pastel-colored or frosted glass bottles. This creates a diffused, soft glow that’s ideal for bedrooms or intimate spaces where you want a calming effect.
- Mix and Match – If you want to get creative, try mixing different colors and bottle shapes. This approach can give your chandelier an eclectic, artistic feel. You might even consider using different bottle sizes to add visual interest.
Incorporating LED Lights
Another way to enhance the look and functionality of your chandelier is by using LED lights. LED bulbs are more energy-efficient than traditional incandescent bulbs and have a much longer lifespan, making them a great choice for this project. Additionally, LED lights emit less heat, which is important when working with glass.
Here are some options for using LED lights in your chandelier:
- Colored LED Bulbs – If you’re using clear bottles but still want a splash of color, consider using colored LED bulbs. These can add a fun, modern twist to your chandelier without needing colored glass.
- Dimmable LED Bulbs – Installing dimmable LED bulbs gives you control over the brightness of your chandelier. This is particularly useful if you plan to use the chandelier in multiple settings, such as during dinner parties or when you want a softer, ambient light.
- Smart LED Bulbs – For a high-tech upgrade, you could use smart LED bulbs. These allow you to change the color and brightness via a smartphone app or voice commands, adding an extra layer of convenience and customization to your DIY project.
By experimenting with different bottle colors and LED lighting, you can truly make your chandelier a centerpiece that reflects your personal style and the ambiance of your home.
Where to Hang Your Recycled Glass Bottle Chandelier
The beauty of a recycled glass bottle chandelier is its versatility. It can be the perfect accent piece in a variety of spaces, each with its own unique lighting needs. When deciding where to hang your chandelier, consider the room’s purpose, decor style, and ceiling height. Here are some ideal places to showcase your creation:
Dining Room
A recycled glass bottle chandelier can make a stunning centerpiece above your dining table. Whether your space is rustic, industrial, or modern, the chandelier adds a warm, inviting glow that’s perfect for dinner gatherings. Make sure to hang the chandelier about 30 to 36 inches above the dining table to provide adequate lighting without obstructing views.
Kitchen Island
If you have a kitchen island, a linear chandelier made from glass bottles can add both style and function. This placement provides task lighting while adding an artistic element to the room. You can hang the bottles in a straight line or in a staggered formation for a more casual look.
Living Room
In a living room, a large bottle chandelier can become the focal point of the space. For living rooms with high ceilings, consider hanging the chandelier lower to create a cozy, intimate setting. If your room has a lower ceiling, opt for a more compact design with fewer bottles.
Outdoor Patio
Take your recycled chandelier outside! An outdoor patio or deck is a great spot for an upcycled chandelier, especially if you use LED lights to make it energy-efficient. Hanging the chandelier above a seating area can create a beautiful ambiance for outdoor dining or relaxing in the evening. Just ensure that you use outdoor-rated electrical components to keep the installation safe from the elements.
Entryway or Foyer
For a grand first impression, hang your chandelier in the entryway or foyer. A glass bottle chandelier can be an unexpected yet captivating piece to greet guests as they enter your home. Choose a larger design to fill the vertical space of a high ceiling or use colored bottles to make an artistic statement.
Maintenance Tips for Your Glass Bottle Chandelier
Once your chandelier is installed, keeping it clean and well-maintained is key to preserving its beauty and ensuring its longevity. Glass bottles can accumulate dust, especially if they’re placed in areas with regular airflow. Here’s how to keep your chandelier looking its best:
Regular Dusting
Dust the bottles regularly using a microfiber cloth or a duster with an extendable handle. If the bottles are hung high or are difficult to reach, a dusting attachment for your vacuum cleaner can be a helpful tool.
Deep Cleaning
For a more thorough clean, carefully remove the bottles and wash them with warm, soapy water. Be sure to dry the bottles completely before reattaching them to avoid any water marks or condensation.
Check Electrical Components
Every few months, inspect the wiring and electrical components to ensure everything is working properly. If you notice any fraying wires or flickering bulbs, address the issue immediately to prevent potential hazards.
Polishing Glass
To keep the glass shining, you can use a glass cleaner or a mixture of vinegar and water. This helps remove smudges and fingerprints, especially if the chandelier is placed in a high-traffic area.
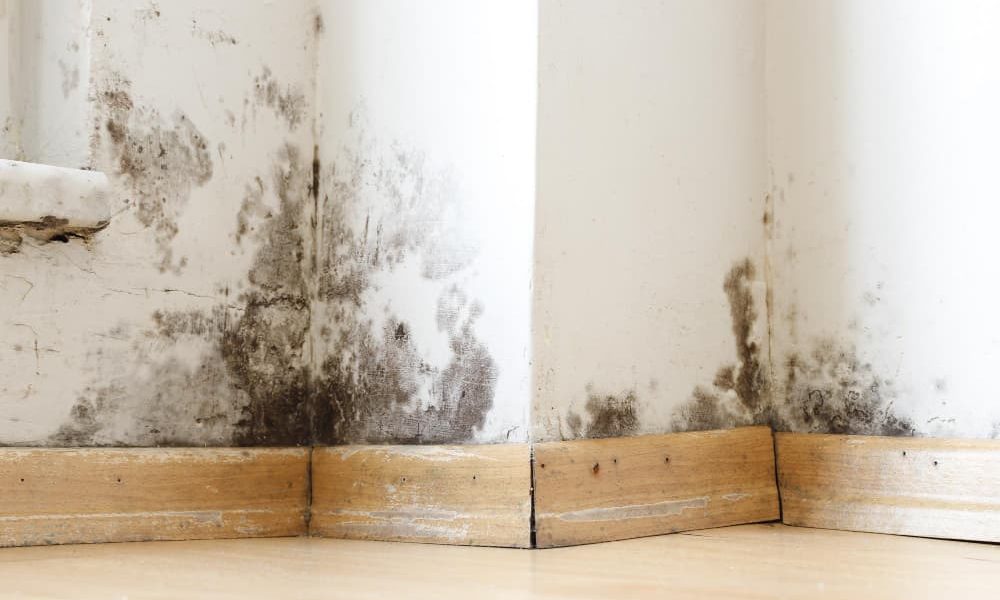
Knowing how to eliminate moisture that rises from the ground is not easy: today we will provide you with Read more
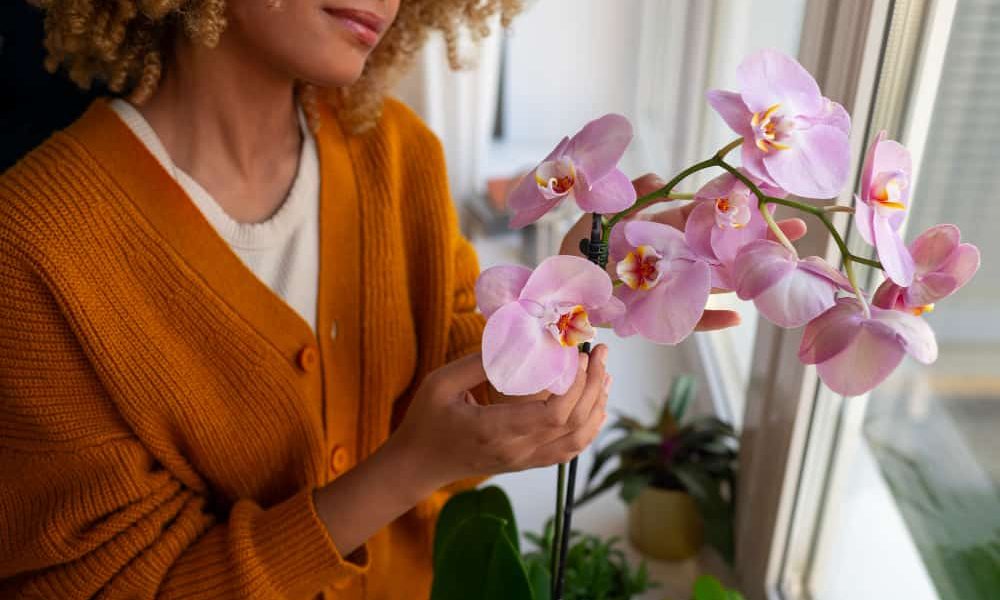
Discover how to care for an orchid with our expert guide, covering everything from proper lighting to disease prevention. Read more

If you have run out of ideas, but you want to know how to decorate a Christmas tree with tinsel, Read more
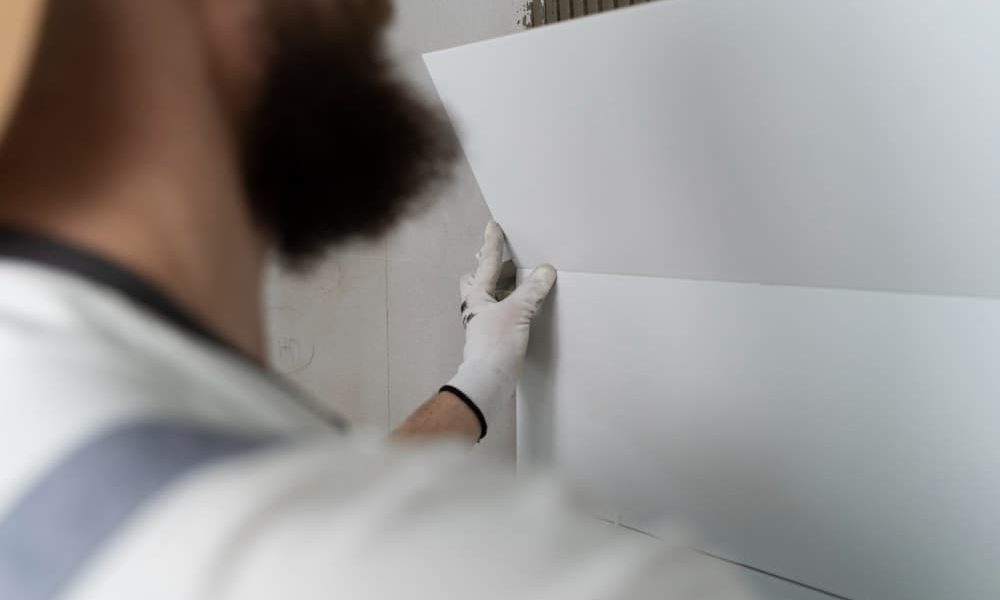
If you are interested in learning how to safely install anti-humidity plates on your own, saving time and money, don't Read more
Conclusion: Embracing Sustainability in Home Decor
Making a DIY chandelier from recycled glass bottles is not only a creative project but also a step toward a more sustainable lifestyle. By reusing materials that would otherwise end up in a landfill, you’re contributing to a more eco-friendly home and reducing your environmental footprint. Plus, the finished product is a unique, personalized piece that can’t be bought in any store.
In a world where sustainability is increasingly important, projects like this allow us to take small, meaningful steps toward a greener future. And the best part? You don’t need to compromise on style. A recycled glass bottle chandelier proves that sustainability can be beautiful, functional, and entirely your own.
So, what are you waiting for? Gather those empty bottles, unleash your creativity, and light up your home with a chandelier that’s both stunning and sustainable.


