In a world where sustainability and creativity often go hand in hand, repurposing old items into new, functional decor has become a popular trend among DIY enthusiasts and eco-conscious homeowners alike. One such item that often gets overlooked but holds tremendous potential for upcycling is the humble shutter. Originally designed to cover windows and provide shade, old shutters can be transformed into stunning wall decor that brings character, charm, and a personal touch to any space.
Whether you’re looking to add a rustic farmhouse vibe to your living room or create a statement piece that serves as both functional and decorative, repurposing shutters offers endless possibilities. From photo displays and message boards to plant holders and shelving units, there’s no shortage of ways to breathe new life into these forgotten treasures.
This guide will walk you through the step-by-step process of repurposing old shutters into beautiful DIY wall decor. Along the way, you’ll learn tips and tricks for choosing the right shutters, preparing them for upcycling, and discovering creative ways to personalize your project. So, roll up your sleeves, grab some paint, and let’s get started on turning those old shutters into a one-of-a-kind masterpiece for your home!
1. Why Repurpose Old Shutters into Wall Decor?
Repurposing old shutters into wall decor is a brilliant way to blend functionality with sustainability while adding a touch of rustic charm to your home. In an era where environmental awareness is paramount, finding creative ways to upcycle and reuse items instead of sending them to the landfill has become a trend that’s not only eco-friendly but also budget-friendly. Old shutters, often discarded or forgotten in attics and garages, can be transformed into beautiful, versatile wall decor that brings character to any space.
Environmental Benefits of Repurposing Old Shutters
One of the most compelling reasons to repurpose old shutters is the environmental impact. We live in a time where waste reduction is essential. By reusing materials like old shutters, you’re contributing to the fight against unnecessary waste. Many shutters are made from durable materials such as wood, which can take years to decompose in a landfill. Rather than letting these shutters contribute to growing landfills, giving them a second life through upcycling reduces the need for new materials and resources.
Another environmental benefit is the reduced carbon footprint. Manufacturing new home decor requires energy and resources. By repurposing existing materials, you’re bypassing the production chain, which often involves deforestation, transportation, and packaging—all of which contribute to pollution and global warming. Choosing to upcycle old shutters can reduce demand for new products, supporting a circular economy where materials are reused rather than disposed of.
Cost-Effective Home Makeover
In addition to being environmentally responsible, repurposing old shutters into wall decor is cost-effective. Home renovations and decor updates can quickly become expensive, but using materials you already have or can find for free (or at a low cost) helps stretch your budget. Old shutters can often be found at flea markets, yard sales, or secondhand stores, making them an affordable base for a variety of DIY projects.
The cost savings extend beyond just the material. When you repurpose shutters into functional or decorative pieces, you save money on pre-made items that would likely be more expensive. For instance, turning shutters into a picture frame or a coat rack can be done for a fraction of the price you’d pay in a home goods store.
Unique and Personalized Home Decor
Repurposing old shutters also gives you the opportunity to create something truly unique and personalized. Unlike mass-produced decor that can be found in countless homes, a DIY shutter project allows you to put your personal touch on the design. You can paint the shutters any color, distress them for a vintage look, or even add hardware for extra functionality. Whether you prefer a farmhouse aesthetic, a coastal theme, or modern minimalism, old shutters can be adapted to fit any style.
The texture and history of the shutters themselves add character to your home. Old shutters often carry the patina of age, telling a story of where they’ve been. When repurposed as wall decor, they bring that history into your living space, creating a conversation piece that stands out. Each scratch, weathered spot, or faded area adds to the charm, making your decor not only beautiful but also meaningful.
2. Choosing the Right Shutters for Your Wall Decor Project
Now that you’re convinced of the benefits of repurposing shutters, the next step is selecting the right shutters for your project. Not all shutters are created equal, and choosing the appropriate ones can make or break your DIY decor. The type, condition, and size of the shutters are key factors to consider when embarking on your upcycling journey.
Assessing the Condition of the Shutters
Before starting your project, it’s important to carefully assess the condition of the shutters you’re working with. Old shutters, especially those that have been exposed to the elements, may have suffered from wear and tear. However, this doesn’t mean they can’t be repurposed. In fact, some wear can add to the charm of the final product. That said, you’ll want to inspect the shutters for structural integrity. Are they solid, or are they falling apart? Shutters that are cracked, warped, or heavily damaged may require more work to restore, but they’re not necessarily beyond saving.
If you’re looking for a rustic or distressed aesthetic, minor imperfections like chipped paint or small cracks can actually enhance the final look. However, if you prefer a cleaner or more polished finish, shutters that are in better condition will save you time and effort in prepping them for the project.
Choosing Between Wooden, Metal, or Vinyl Shutters
The material of the shutters plays a significant role in determining their suitability for different types of wall decor projects. Wooden shutters are the most versatile and popular option for DIY decor projects due to their ease of customization. Wood can be sanded, painted, stained, and cut to fit your desired look. It also tends to be more durable and can handle the weight of additional embellishments such as picture frames, shelves, or hooks.
Metal shutters, while less common, can offer a more industrial or modern aesthetic. They’re durable and can be painted or left in their natural state for a sleek, minimalist look. However, working with metal requires different tools, and you’ll need to take into account any potential rusting if the shutters have been exposed to moisture over time.
Vinyl shutters, on the other hand, are lightweight and easier to handle but offer less customization potential than wood. Vinyl can be painted, but it’s not as easy to sand or modify. They’re best suited for simpler projects where you want to add color or use the shutters as-is without significant alterations.
Size and Scale of Shutters
Another important consideration is the size and scale of the shutters relative to the space where you’ll be displaying them. Large shutters can create a bold statement piece, while smaller shutters work well for more subtle decor or accent pieces. If you’re planning to use the shutters as a backdrop for artwork or photos, make sure the size complements the items you plan to display.
Additionally, the placement of the shutters within the room should be considered. A tall, narrow shutter can add height to a space, drawing the eye upward and making the room feel larger. Meanwhile, horizontal shutters can elongate a wall and create a more expansive feel.
By carefully selecting the right shutters for your DIY wall decor project, you’ll set yourself up for success and ensure that the finished piece enhances your space in both style and function.
3. Preparing the Shutters for Repurposing
Once you’ve chosen the perfect shutters for your DIY wall decor project, it’s time to prepare them for repurposing. Proper preparation is crucial to ensuring that your shutters are not only aesthetically pleasing but also durable enough to serve as long-lasting decor pieces. While old shutters often come with imperfections, this can add character to the final product if handled correctly.
Cleaning and Sanding the Shutters
Before anything else, your first task is to thoroughly clean the shutters. Over time, shutters can accumulate layers of dirt, dust, and grime, especially if they’ve been stored outdoors or in a garage. Begin by using a mild soap and water solution to scrub the shutters clean. A soft brush or sponge will help you reach into the grooves and slats of the shutter to remove any debris. Rinse with water and allow the shutters to dry completely before moving on to the next steps.
Once dry, inspect the surface for any rough spots, splinters, or chipped paint. Sanding is essential to smooth out the surface and prepare it for painting or staining. If you’re working with wooden shutters, use a medium-grit sandpaper to smooth any rough areas and remove loose or flaking paint. For metal or vinyl shutters, use a fine-grit sandpaper to lightly scuff the surface, which will help paint adhere more effectively. Make sure to wipe the shutters down after sanding to remove dust and debris.
Repairing Damages
Old shutters may have seen better days, and you might encounter issues like cracks, loose slats, or broken pieces. Luckily, minor damages can often be repaired with basic tools and materials. If you’re dealing with wooden shutters, wood filler is a quick fix for small cracks or holes. Apply the filler, let it dry, and then sand it smooth for a seamless finish.
For loose or broken slats, you may need to reattach them with wood glue or small nails. If the damage is too extensive, you can always remove certain slats altogether and reimagine the design of the shutter with a more open or minimalist look. This adds a unique touch to the decor while allowing you to repurpose even heavily damaged shutters.
Priming the Shutters
After your shutters are clean, sanded, and repaired, the next step is to apply a primer. Priming is especially important if you plan to paint the shutters, as it helps the paint adhere properly and ensures a smooth, even finish. If your shutters were previously painted, a primer will also prevent any old colors or stains from showing through your new paint job. Use a brush or roller to apply an even coat of primer and allow it to dry completely before moving on to the painting stage.
4. Painting and Finishing Ideas for Shutters
Now comes the fun part—bringing your vision to life with color and finishing touches. Painting or staining your shutters can transform them from old, forgotten pieces into stunning works of art that suit your home’s style. Whether you prefer a clean, polished look or a more rustic, distressed finish, there are countless ways to customize your shutters.
Choosing the Right Paint or Stain
The first step in the finishing process is deciding whether to paint or stain the shutters. If you’re going for a more natural or rustic look, a stain may be the better option. Stains come in a variety of shades, allowing you to enhance the wood’s natural grain while adding color. If you’re working with wooden shutters and want to preserve their organic beauty, a stain will add depth and warmth to the piece.
For a more vibrant or polished look, painting is the way to go. Choose a color that complements the rest of your decor or adds a pop of contrast. If you want a classic look, opt for neutral tones like white, gray, or black. For a more playful or creative approach, bright colors like teal, yellow, or coral can make the shutters stand out as a focal point. When selecting paint, be sure to choose a type that’s suitable for the material of your shutters—latex or acrylic paint works well for wood, while metal or vinyl shutters require specialized paints.
Distressing for a Vintage Look
If you’re a fan of the shabby chic or farmhouse style, distressing the shutters is a great way to add a vintage, weathered appearance. This technique is especially effective with wooden shutters and can be easily achieved using a few simple tools. Start by applying a base coat of paint in the color of your choice. Once the paint has dried, use sandpaper to gently rub away some of the paint in areas where natural wear would occur, such as the edges and corners.
For a more layered look, you can apply two coats of different colored paint—one as a base layer and another as the top coat. After both coats have dried, sand through the top layer to reveal the base color underneath, giving the shutters a multi-dimensional, aged appearance.
Sealing for Durability
Whether you choose to paint or stain your shutters, applying a sealant is essential to protect your hard work. A clear topcoat, such as polyurethane or a matte finish sealer, will shield the shutters from moisture, dust, and daily wear. This step is particularly important if the shutters will be displayed in high-traffic areas or outdoors, as it will help preserve the color and finish over time.
5. DIY Shutter Wall Art: Step-by-Step Guide
With your shutters prepped and painted, it’s time to turn them into functional and decorative wall art. The versatility of old shutters means there are endless possibilities for creative projects. In this section, we’ll provide a step-by-step guide for creating a few popular shutter decor items: a photo display, a message board, and a plant holder.
Project 1: Shutter Photo Display
Materials Needed:
- Old shutter
- Clothespins or small hooks
- Twine
- Photos or artwork
- Hammer and nails or adhesive hooks for hanging
Instructions:
- Start by deciding the placement of your photos on the shutter. You can string twine across the slats and use clothespins to attach photos, or you can attach small hooks directly to the shutter for hanging pictures.
- Measure and cut the twine, securing it to the back of the shutter with small nails or adhesive hooks.
- Attach your photos or artwork using clothespins or hooks.
- Mount the shutter on the wall using nails or wall brackets. The shutter serves as a creative, ever-changing gallery for your favorite memories.
Project 2: Shutter Message Board
Materials Needed:
- Old shutter
- Chalkboard paint or corkboard
- Chalk or push pins
- Screws and drill for mounting
Instructions:
- Paint the center of the shutter with chalkboard paint or cut corkboard to fit between the slats, securing it with adhesive.
- Let the paint dry or ensure the corkboard is firmly in place.
- Hang the shutter in a convenient spot and use chalk to write messages, grocery lists, or reminders. Alternatively, use the corkboard to pin notes and photos.
Project 3: Shutter Plant Holder
Materials Needed:
- Old shutter
- Small pots or planters
- Hooks or brackets
- Plants or herbs
Instructions:
- Attach hooks or small brackets to the shutter where you want the pots to hang.
- Secure the pots or planters to the hooks.
- Mount the shutter on a wall, ensuring it’s strong enough to support the weight of the plants.
- Add your favorite plants or herbs, creating a vertical garden display that brings life and greenery into your space.
These are just a few ideas to get you started, but the possibilities are endless! Whether you’re using shutters for practical purposes or purely decorative ones, they offer a unique way to add character to any room.
6. Creative Ways to Use Shutters as Wall Decor
One of the most exciting aspects of repurposing old shutters into wall decor is the sheer number of creative possibilities. From statement pieces to functional installations, old shutters can be transformed in countless ways to suit your personal style and the aesthetic of your home. Here are a few inventive ideas to inspire your next DIY project.
Shutter as a Picture Frame Gallery
If you’re looking to create a personalized display of your favorite photos, turning shutters into a gallery wall is a charming and unique solution. The vertical slats of the shutter are perfect for clipping on prints, photos, postcards, or small pieces of art. You can use string lights or decorative clothespins to hold the photos in place, making it easy to swap them out for new ones whenever you want.
This idea works well for family photos, vacation snapshots, or even a rotating display of seasonal art. The great thing about this project is that it’s adaptable—you can keep it as a casual, rustic display or paint and decorate the shutter for a more polished look.
Shutters as a Display Shelf
Another practical and stylish use for old shutters is to convert them into a display shelf. This works particularly well with wider shutters or shutters that have multiple panels. Simply attach small, sturdy shelves or brackets to the front of the shutter. You can then mount the shutter on the wall and use the shelves to display small plants, candles, books, or other decorative items.
This design not only adds storage but also serves as an eye-catching piece of wall art. The combination of open shutter slats and shelving creates an intriguing visual contrast, and the overall design can easily be customized to suit your space.
Shutter as a Jewelry Organizer
Shutters also make excellent organizers, especially for items like jewelry. The narrow slats are ideal for hanging necklaces, bracelets, or even earrings. You can add small hooks or wire mesh between the slats to increase the functionality of the shutter. Once mounted on the wall, your shutter jewelry organizer becomes both a practical storage solution and a decorative element in your bedroom or closet.
For added flair, consider painting the shutter in a bright or metallic color to contrast with the jewelry and make it stand out even more. This is a perfect way to upcycle a smaller shutter that might not fit into a larger decor plan but still has plenty of potential.
7. Hanging and Displaying Shutter Wall Decor
After completing your shutter project, the final step is hanging it in your chosen space. Because shutters vary in size and weight, it’s important to use the correct hardware and techniques to ensure your decor is safely and securely mounted on the wall.
Using the Right Hardware
The first step in hanging your shutter wall decor is selecting the appropriate hardware. For smaller shutters, standard picture hangers or adhesive wall hooks may be sufficient. However, if you’re working with larger or heavier shutters, you’ll need to use more durable mounting options, such as wall anchors or screws.
Make sure to check the weight capacity of the hardware you plan to use. Heavier shutters may require two or more screws for proper support, while lighter shutters can often be hung with just one or two picture hooks. If your shutter design includes shelves or other attachments, account for the additional weight of any items you’ll display.
Placement and Arrangement Tips
When deciding where to hang your shutter decor, consider the layout of the room and the role the piece will play in your overall design. For example, if you’re creating a photo display or vertical garden, you might want to place the shutter in a prominent spot where it will serve as a focal point. On the other hand, if your shutter is functioning more as a backdrop, such as behind a sofa or bed, the placement should complement the furniture without overpowering it.
For a balanced look, try hanging the shutter at eye level, approximately 57-60 inches from the floor. If you’re hanging multiple shutters together, consider staggering their heights or arranging them in a grid to create visual interest.
8. Personalizing Your Shutter Decor
One of the best parts of DIY projects is the ability to personalize your creation to suit your taste and home decor. Shutters offer plenty of opportunities for customization, from the color and finish to additional embellishments and functionality.
Adding Hooks and Hardware
If you want to make your shutter decor even more functional, consider adding hooks or knobs to the frame. This is especially useful if you plan to use the shutter as an entryway organizer for keys, hats, or bags. Hooks can also be added to the slats for hanging decorative items, seasonal wreaths, or small plants.
Incorporating Family Photos or Personal Items
For a more personal touch, you can incorporate family photos, artwork, or sentimental items into your shutter decor. For example, if you’re using the shutter as a photo display, you might add small frames or labels to showcase cherished memories. You can also attach small mementos like postcards, travel souvenirs, or even handwritten notes to make the piece feel truly unique.
Stenciling and Decorative Elements
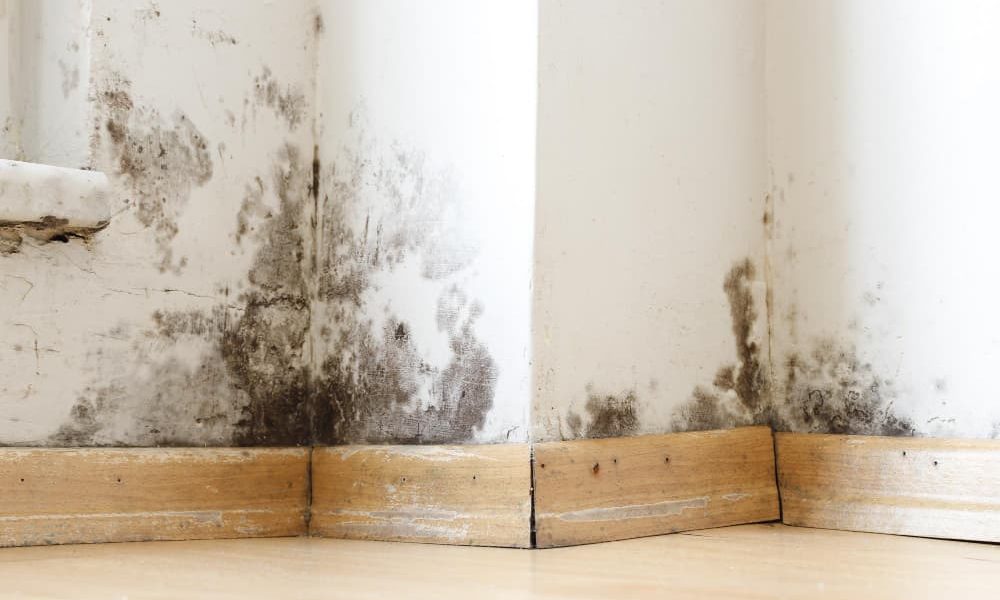
Knowing how to eliminate moisture that rises from the ground is not easy: today we will provide you with Read more
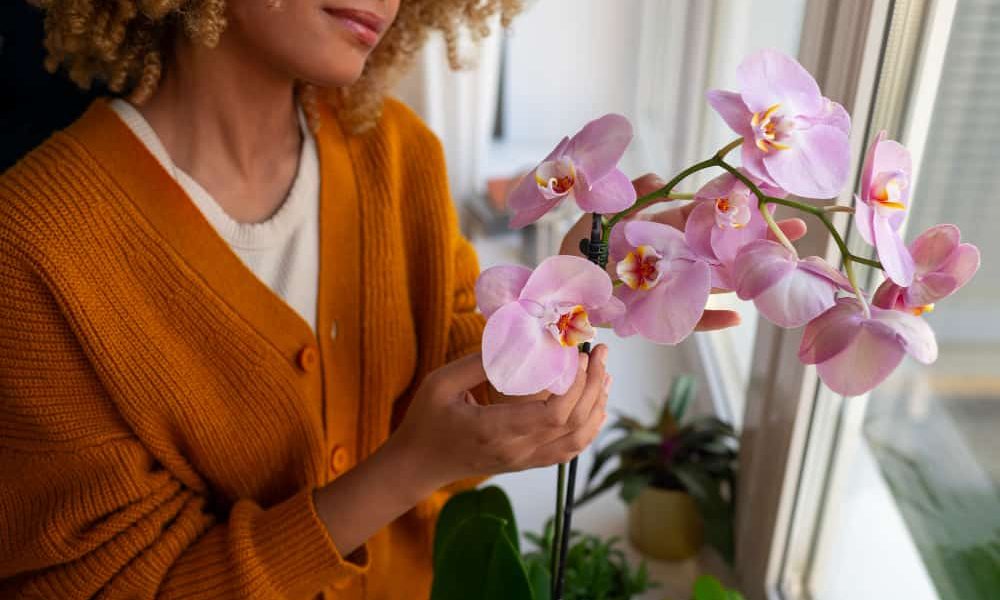
Discover how to care for an orchid with our expert guide, covering everything from proper lighting to disease prevention. Read more
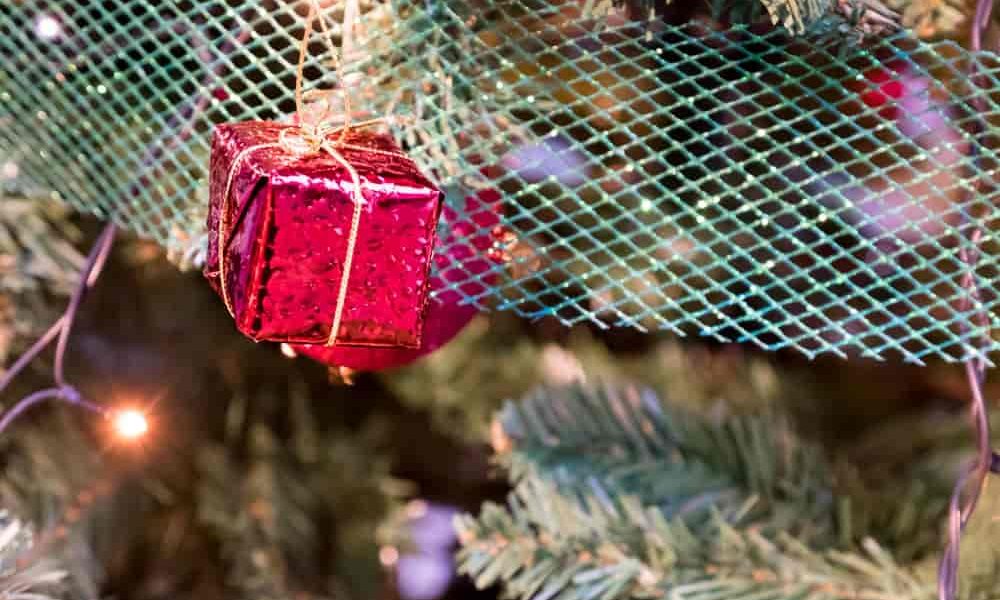
If you have run out of ideas, but you want to know how to decorate a Christmas tree with tinsel, Read more
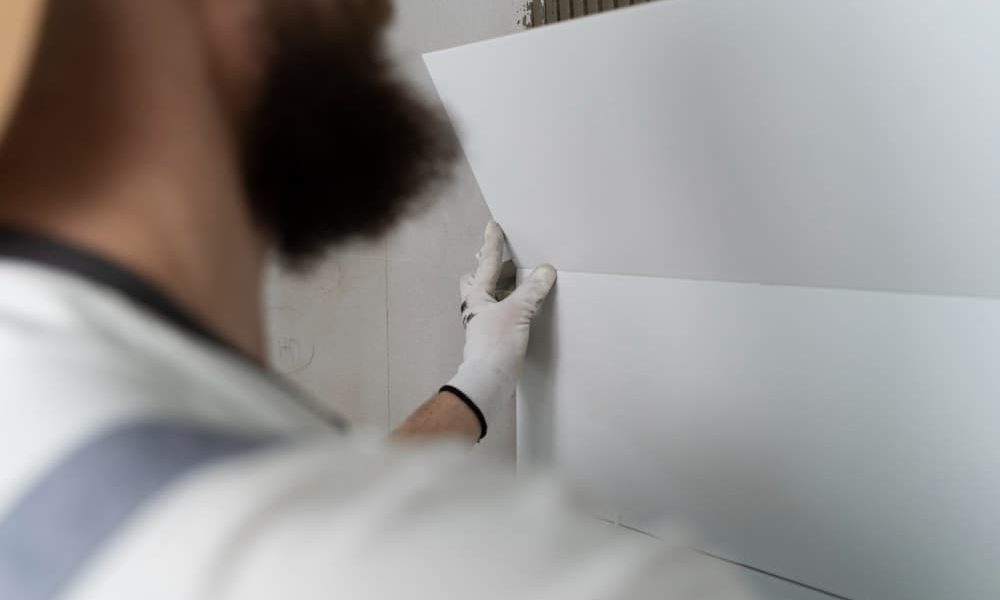
If you are interested in learning how to safely install anti-humidity plates on your own, saving time and money, don't Read more
Another way to personalize your shutter wall decor is through stenciling or adding decorative elements. You can stencil words, quotes, or designs onto the shutter to reflect your style or the theme of the room. Adding small embellishments like faux flowers, vines, or even fairy lights can elevate the design and make the shutter a standout piece in your home.
Conclusion
Repurposing old shutters into wall decor is an excellent way to breathe new life into forgotten materials while adding character and charm to your home. With a little creativity and effort, these old window coverings can be transformed into everything from functional organizers to stunning statement pieces. Whether you choose to turn your shutters into a photo display, a shelf, or a work of art, the possibilities are endless—and the end result will be a unique, personalized decor item that reflects both your style and your commitment to sustainability.
So, why wait? Start hunting for those old shutters in your garage, at a local flea market, or even online, and get ready to create a one-of-a-kind piece of decor that’s sure to impress.


