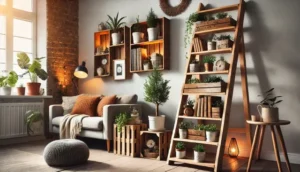
In today’s world, where sustainability and creativity often go hand in hand, more people are turning to DIY projects that are both eco-friendly and budget-conscious. One material that is gaining popularity for its versatility and environmental benefits is recycled cardboard. What was once seen as disposable packaging is now being repurposed into functional, stylish furniture. A great example of this is the DIY bookshelf made from recycled cardboard, offering not only a creative challenge but also a practical solution for storing books, decor, and other household items.
Why cardboard, you may ask? Cardboard is lightweight, easy to work with, and can be surprisingly durable when reinforced properly. Best of all, it’s often free and abundant—perfect for those looking to save money while reducing waste. Whether you’re a seasoned DIY enthusiast or someone looking for a simple project to get started, building a bookshelf from recycled cardboard is a fantastic way to exercise your creativity and contribute to a greener planet.
In this guide, we’ll walk you through everything you need to know to craft your own cardboard bookshelf, from selecting the right materials to decorating and customizing it to match your style. Along the way, you’ll discover tips and tricks for maximizing the strength of your cardboard structure, reinforcing it to hold books and other items securely. Whether you need extra storage or just want to try your hand at a sustainable DIY project, this tutorial will equip you with all the tools and knowledge to get started. Let’s dive into the world of cardboard crafting!
Why Use Recycled Cardboard for a DIY Bookshelf?
In an era where sustainability and environmental consciousness have taken center stage, the appeal of DIY projects, particularly those using recycled materials, has skyrocketed. Among the most versatile and eco-friendly materials for DIY furniture is recycled cardboard. While it may seem like an unconventional choice, cardboard has proven to be a surprisingly sturdy and cost-effective option for creating functional, customizable pieces. So, why should you choose recycled cardboard for your next DIY bookshelf project? Let’s explore the numerous benefits that make it an ideal material for crafting your own eco-friendly furniture.
- Environmental Impact: Reducing Waste and Promoting Sustainability
One of the most significant advantages of using recycled cardboard for your bookshelf is the positive environmental impact. Every year, millions of tons of cardboard are produced and subsequently discarded, contributing to waste in landfills. By repurposing cardboard into a functional piece of furniture, you help reduce this waste and contribute to a more sustainable lifestyle. Cardboard is a biodegradable material, meaning that even if it eventually needs to be disposed of, it has a significantly lower environmental footprint than plastics or other non-recyclable materials.
Moreover, crafting with recycled cardboard emphasizes the importance of reusing materials that would otherwise be discarded. By upcycling, you minimize the need for new resources and promote a circular economy. This mindset not only helps the environment but also inspires creativity in transforming what might be seen as waste into something valuable and practical.
- Cost-Effectiveness: A Budget-Friendly Furniture Option
Another compelling reason to opt for recycled cardboard is its cost-effectiveness. Traditional wooden bookshelves, especially custom designs, can be expensive to purchase or even to build. Cardboard, on the other hand, is readily available and often free. Whether you’re repurposing old boxes from deliveries or sourcing cardboard from local stores or recycling centers, the material costs for a cardboard bookshelf are minimal.
For those looking to furnish their homes on a budget, particularly students, renters, or first-time homeowners, cardboard offers a low-cost solution without compromising on functionality. And because cardboard is easy to work with, you won’t need to invest in expensive tools or specialized equipment to complete your project. A basic set of tools—such as a ruler, box cutter, and glue—is all you need to get started.
- Surprising Durability: How Sturdy is Cardboard?
One common misconception about cardboard is that it’s flimsy and not durable enough to support weight. However, with the right techniques and reinforcements, cardboard can be surprisingly sturdy. Corrugated cardboard, which is the type commonly used in shipping boxes, consists of multiple layers that provide strength and rigidity. By stacking and layering cardboard, you can significantly increase its load-bearing capacity, making it strong enough to support books, decorative items, or even small electronics.
Additionally, there are various methods to reinforce cardboard structures, such as doubling the layers, using cross-bracing, or applying glue to strategic points. With these techniques, you can create a bookshelf that is not only functional but also capable of holding a decent amount of weight. While it may not have the longevity of solid wood or metal, a well-made cardboard bookshelf can serve its purpose for years if properly cared for.
- Customizability: A Canvas for Creativity
One of the most exciting aspects of working with cardboard is the opportunity for complete customization. Unlike pre-made bookshelves or those made from more rigid materials, cardboard is incredibly easy to shape, cut, and design according to your specific needs. Want a bookshelf that fits perfectly in that odd corner of your living room? Or maybe you need shelves of different sizes to accommodate books, plants, or decorative items? With cardboard, you can tailor every aspect of the bookshelf to fit your space and style.
The lightweight nature of cardboard also means you can experiment with various designs without worrying about the constraints of heavy materials. Whether you prefer minimalist, modern, or quirky designs, cardboard provides the flexibility to let your imagination run wild. And because it’s inexpensive, you can afford to make mistakes, learn from them, and improve your crafting skills along the way.
Choosing the Right Cardboard for a DIY Bookshelf
Now that you’re sold on the idea of using recycled cardboard for your bookshelf, the next important step is choosing the right type of cardboard. Not all cardboard is created equal, and selecting the appropriate variety is crucial to ensuring your bookshelf is both sturdy and long-lasting.
- Corrugated Cardboard: The Best Choice for Structural Strength
The key to building a strong and durable bookshelf lies in using corrugated cardboard, which is easily recognizable by its fluted inner layer sandwiched between two flat outer sheets. This design provides strength and rigidity, making it ideal for constructing furniture. The flutes, or ridges, inside the cardboard act as reinforcements that distribute weight and prevent the material from buckling under pressure.
Corrugated cardboard comes in different thicknesses, commonly referred to as single-wall, double-wall, or even triple-wall. For a bookshelf, double-wall cardboard is a good balance between strength and ease of handling. If you anticipate storing heavy items on your bookshelf, consider using double or even triple layers of cardboard for added support. The more layers you use, the more weight your shelf will be able to hold.
- Sourcing Recycled Cardboard: Where to Find It
Recycled cardboard is not only environmentally friendly but also incredibly easy to source. Start by looking around your home for any unused boxes from recent deliveries or moving. Large appliance boxes, in particular, provide a sturdy and reliable source of cardboard for your project. If you don’t have any on hand, consider visiting local grocery stores, hardware stores, or recycling centers. These places often have large quantities of cardboard that they are willing to give away for free.
You can also reach out to local community groups or online forums where people may offer cardboard boxes they no longer need. Whether you’re sourcing cardboard locally or from your own stockpile, make sure the boxes are clean, dry, and free of contaminants like oil or moisture, as this can weaken the material and shorten the lifespan of your bookshelf.
By choosing the right type of cardboard and reinforcing it with creativity, you can craft a DIY bookshelf that not only meets your needs but also supports a sustainable lifestyle. Stay tuned as we delve into the step-by-step guide to building your very own cardboard bookshelf in the next section!
Tools and Materials Needed for a DIY Cardboard Bookshelf
Before jumping into the process of building your DIY bookshelf, it’s essential to gather the necessary tools and materials. Fortunately, one of the many benefits of working with recycled cardboard is the simplicity of the required materials—no need for expensive woodworking tools or hard-to-find supplies. Below is a comprehensive list of what you’ll need to complete your project.
- Basic Tools
While cardboard is relatively easy to work with, having the right tools ensures that your project will not only look polished but also be structurally sound. The following tools will help you cut, measure, and reinforce your cardboard bookshelf.
- Box cutter or utility knife: For making precise cuts through thick layers of cardboard, a sharp box cutter or utility knife is essential. Ensure your blade is sharp to avoid jagged edges or tearing the cardboard. Dull blades can also make the process more difficult and lead to mistakes.
- Scissors: While a box cutter works best for thick cuts, a sturdy pair of scissors is useful for trimming smaller pieces and making more intricate designs.
- Ruler or measuring tape: Accurate measurements are crucial to ensure your bookshelf is level and symmetrical. A metal ruler or measuring tape is ideal for this task, as you can also use it to guide your cutting for straight edges.
- Pencil or marker: Use a pencil or marker to outline your design on the cardboard before cutting. This step is particularly important for ensuring that all your pieces match in size and shape.
- Hot glue gun or strong craft glue: To bond the layers of cardboard and attach various pieces, you’ll need a strong adhesive. Hot glue works quickly and provides a strong bond, making it a popular choice for cardboard projects. Alternatively, high-quality craft glue can work if hot glue is not available.
- Cutting mat or thick cardboard for surface protection: To protect your working surface from cuts and glue, it’s a good idea to use a cutting mat or an extra layer of thick cardboard underneath your project.
- Additional Materials for Reinforcement
While cardboard on its own is a surprisingly durable material, certain reinforcements will enhance the overall strength and longevity of your DIY bookshelf. These additional materials will help support heavier items and ensure that your bookshelf stands the test of time.
- Double-sided tape: For extra stability, consider using double-sided tape in combination with glue. This provides additional adhesion without adding bulk to your design.
- Reinforcing tape or duct tape: Duct tape is a great option for reinforcing edges, corners, and joints. Applying tape along the seams of your cardboard structure will prevent bending or tearing under pressure.
- Wooden dowels or sticks: For extra stability, you can insert wooden dowels or similar sticks into the structure. This is particularly useful for shelves that will bear heavier loads.
- Paint, wrapping paper, or fabric: To customize and beautify your bookshelf, you can decorate it with paint, wrapping paper, or fabric. Not only will this give your project a polished look, but it can also provide an additional layer of protection against wear and tear.
Step-by-Step Guide: How to Make a Bookshelf from Recycled Cardboard
Now that you have your tools and materials ready, it’s time to dive into the step-by-step process of building your DIY bookshelf from recycled cardboard. Below is a detailed guide that will take you through every phase, from cutting the cardboard to assembling the final product.
Step 1: Design and Measure Your Bookshelf
The first step in any DIY project is planning. Take time to design your bookshelf according to your space, storage needs, and style preferences. Consider how many shelves you want and how wide and tall each shelf should be.
- Measure the available space where you plan to place your bookshelf. This will give you a clear idea of the dimensions your bookshelf should have.
- Draw a sketch of your bookshelf. This doesn’t need to be overly detailed but should include the basic layout, including shelf heights, widths, and overall dimensions.
- Decide on the number of shelves you want. Typical bookshelves have two to five shelves, depending on the height.
Step 2: Cut the Cardboard Pieces
Once your design is finalized, it’s time to cut the cardboard to match the dimensions of your plan. You’ll need multiple pieces for the sides, back, and shelves. Follow these steps:
- Cut the sides of the bookshelf from double-wall corrugated cardboard, making sure they are the same height and width.
- Cut the shelves according to your measurements. To ensure durability, consider cutting two or three layers for each shelf. These layers can be glued together later to form stronger shelves.
- Cut the back panel: A back panel is crucial for stability, so measure and cut a piece that fits the width and height of the overall bookshelf.
- Additional pieces: Depending on your design, you might want to cut smaller support pieces for the middle or to reinforce the corners of the bookshelf.
Step 3: Assemble the Frame
With all your pieces cut, you can now begin assembling the main structure of the bookshelf.
- Attach the back panel to the sides: Use glue or hot glue to securely attach the back panel to the side pieces of the bookshelf. Reinforce the joints with duct tape or reinforcing tape if needed.
- Add the shelves: Attach the shelves to the side panels. You can either glue the shelves directly or use support tabs by cutting small slits into the side panels and inserting the edges of the shelves. For added support, apply glue to the tabs.
- Reinforce the structure: Add reinforcing tape along the joints where the sides, shelves, and back meet. If you’ve chosen to use wooden dowels or extra layers of cardboard, insert or glue them into place now.
Step 4: Reinforce and Finish the Shelves
To ensure the shelves can hold weight, reinforce them by layering cardboard and adding extra adhesive where necessary. You can also insert support columns beneath each shelf for added strength. Once everything is secure, test the stability by gently pressing down on each shelf.
Step 5: Customize and Decorate
Now that your bookshelf is assembled, you can begin the customization phase. Use paint, fabric, or wrapping paper to cover the cardboard and give your bookshelf a polished, professional look. Consider using environmentally friendly paints or upcycled materials for decoration to stay true to the eco-friendly nature of the project.
- Add patterns or designs: Using stencils or markers, you can create unique designs or add your own personal flair.
- Seal for protection: If you want to protect your bookshelf from moisture or wear, consider applying a clear sealant to the exterior.
By following these simple steps, you’ll have a sturdy, eco-friendly DIY bookshelf made entirely from recycled cardboard. Not only is this project budget-friendly, but it’s also a fun way to contribute to a more sustainable lifestyle while adding a personal touch to your home decor.
How to Decorate and Customize Your DIY Cardboard Bookshelf
Now that your DIY bookshelf is built, it’s time to make it uniquely yours. The beauty of using cardboard lies in its versatility and potential for customization. You can easily transform a basic cardboard structure into a stunning piece of home decor with a little creativity. In this section, we’ll explore various ways to decorate and customize your bookshelf to match your personal style while maintaining its eco-friendly roots.
- Painting Your Bookshelf for a Finished Look
Painting is one of the easiest and most effective ways to customize your DIY bookshelf. Since cardboard has a porous surface, it can absorb paint easily, providing a smooth and polished finish when done correctly. Here are some tips to keep in mind when painting your cardboard bookshelf:
- Choose the right paint: For best results, use acrylic or latex paint, which provides a smooth finish and dries quickly. If you’re looking for an eco-friendly option, consider using non-toxic or low-VOC paints. These are safer for the environment and better for indoor air quality.
- Prime the surface: Before applying your main paint color, it’s a good idea to apply a primer. This will help the paint adhere better and prevent the cardboard from absorbing too much paint, which can cause warping. You can use a water-based primer for this purpose.
- Apply multiple thin coats: Instead of applying one thick coat of paint, opt for several thin coats. This helps to prevent the cardboard from becoming too saturated, which could weaken it. Allow each layer to dry fully before applying the next.
- Experiment with colors: You don’t have to stick to neutral tones. Cardboard offers a blank canvas for you to experiment with bold colors, patterns, or even stenciling designs. If you prefer a minimalist look, you can paint the bookshelf in a single color. For a playful touch, consider painting the shelves in different shades or creating geometric patterns.
- Wrapping the Bookshelf with Paper or Fabric
If you want a quick and clean customization option, wrapping your bookshelf in decorative paper or fabric is a great alternative to painting. This method adds both aesthetic appeal and an extra layer of protection to the cardboard, preventing wear and tear.
- Wrapping paper: Choose from an array of patterns, colors, and textures available in wrapping paper. You can use bold prints for a more playful vibe or minimalist designs for a sleek, modern look. Attach the paper using double-sided tape or a light adhesive spray. Be sure to smooth out any air bubbles as you go to achieve a seamless finish.
- Fabric covering: For a more sophisticated and textured look, consider covering your bookshelf with fabric. Choose sturdy fabrics like cotton or linen for easy handling. You can secure the fabric using fabric glue or a hot glue gun. Adding fabric not only elevates the aesthetic but also strengthens the cardboard structure, making it more resistant to wear.
- Decoupage technique: If you’re feeling more creative, try the decoupage technique. This involves gluing paper or fabric pieces in layers to create a collage-like effect. You can use old magazine clippings, newspaper articles, or even recycled wrapping paper to create a personalized design. Once finished, seal it with a layer of Mod Podge or a similar clear-drying adhesive.
- Adding Unique Design Touches and Features
Customization doesn’t have to stop at color and texture. There are plenty of ways to make your bookshelf more functional and stylish by adding small design touches that reflect your personality and needs.
- Handles and knobs: For an extra bit of flair, consider adding decorative handles or knobs to the sides of your bookshelf. These can be made from upcycled materials, such as drawer pulls or even repurposed leather belts, to keep with the eco-friendly theme. While they might not be functional in the traditional sense, they can serve as a fun design element.
- Shelf liners: Adding shelf liners is a simple way to protect the cardboard while enhancing the overall look. You can use patterned contact paper, felt, or even corkboard for the liners. Not only will these materials add color and texture, but they’ll also help prevent scratches or dents from heavier items.
- Decorative cutouts: If you want to add a more artistic touch, consider making cutouts in the sides or back of your bookshelf. You can create geometric patterns, floral designs, or any other shapes that resonate with your style. These cutouts can be covered with colored paper or fabric for a stained-glass effect, or left open for a more minimalist look.
- Lighting elements: To take your bookshelf to the next level, consider adding some LED strip lights along the edges of the shelves. This creates a warm, cozy glow and can highlight the books or decor pieces displayed on the shelves. LED lights are lightweight and easy to install, making them perfect for a cardboard structure.
- Protecting Your Bookshelf from Wear and Tear
While cardboard is a surprisingly sturdy material when reinforced properly, it’s still vulnerable to moisture and damage over time. To prolong the life of your bookshelf and keep it looking fresh, it’s important to take some protective measures:
- Apply a clear sealant: To protect your painted or decorated bookshelf from spills and moisture, apply a clear, water-based sealant. This will create a protective layer that can repel liquids and prevent warping. Be sure to choose a non-toxic sealant if you’re keeping the eco-friendly aspect in mind.
- Use coasters or trays: If you plan on placing items like potted plants or drinks on your bookshelf, always use coasters or trays. This will prevent moisture from seeping into the cardboard and causing damage.
- Add felt pads or rubber stoppers: If your bookshelf sits directly on the floor, consider adding felt pads or rubber stoppers to the bottom to prevent wear on the base. This is especially useful if you plan to move the bookshelf around occasionally.
Maintaining and Repairing Your DIY Cardboard Bookshelf
No matter how well-built your DIY bookshelf is, normal wear and tear are inevitable over time. Luckily, cardboard is easy to repair and maintain with just a few simple techniques. Here’s how to ensure your bookshelf remains in tip-top shape for years to come.
- Preventing Damage from Moisture
Moisture is one of the main culprits that can cause damage to cardboard furniture. Since cardboard is a paper-based material, it absorbs water quickly, leading to warping or softening of the structure. To prevent this:
- Keep your bookshelf dry: Avoid placing your bookshelf in areas with high humidity, like near windows or in bathrooms. If necessary, use a dehumidifier in the room to control moisture levels.
- Add a waterproof coating: As mentioned earlier, applying a waterproof sealant can go a long way in protecting your bookshelf from water damage. This step is especially important if you plan to place any plants or liquids on the shelves.
- Reinforcing Weak Spots
Over time, certain areas of your bookshelf might start to weaken or sag, particularly if it’s bearing a heavy load. Reinforcing these areas early on can help prevent further damage:
- Add extra layers of cardboard: If you notice that a shelf is beginning to bow under the weight of books, you can reinforce it by gluing additional layers of cardboard underneath. This will help distribute the weight more evenly and provide additional support.
- Use wooden dowels for added support: Another option for reinforcing shelves is to insert wooden dowels or similar supports along the underside of each shelf. This technique adds structural integrity without compromising the look of the bookshelf.
- Repairing Tears or Dents
Accidents happen, and sometimes your bookshelf might suffer from small tears or dents. Fortunately, these are easy to fix with a little bit of creativity:
- Patch small tears with tape: For minor tears or rips, simply use a strong tape like duct tape or packing tape to patch the area. If the tear is in a visible spot, you can cover the tape with paint, fabric, or decorative paper to hide the repair.
- Replace damaged sections: If a section of the bookshelf is too damaged to be patched, you can always cut a new piece of cardboard to replace it. Carefully remove the damaged part and use it as a template to cut a new piece of the same size and shape. Then, glue the new piece in place and reinforce it with tape or glue.
By following these maintenance and repair tips, you’ll be able to keep your DIY cardboard bookshelf in excellent condition for years to come. With a little care and attention, your eco-friendly furniture piece will remain a functional and stylish addition to your home.
Creative Alternatives to a Bookshelf Using Recycled Cardboard
While a DIY bookshelf made from recycled cardboard is an excellent project, the versatility of cardboard opens the door to even more creative possibilities. Cardboard’s light weight, flexibility, and eco-friendliness make it ideal for crafting a wide range of furniture and home decor items. If you’re feeling inspired and want to explore more DIY projects, here are some creative alternatives to a bookshelf that you can also make using recycled cardboard.
- Cardboard Side Tables
A side table is a simple and practical piece of furniture that can easily be crafted from recycled cardboard. Similar to a bookshelf, it’s essential to reinforce the structure to make sure it can bear weight, especially if you plan to place lamps, books, or drinks on top of it.
- Design options: You can create a minimalist, square side table or experiment with more intricate shapes like hexagons or circles. By layering cardboard for the tabletop and legs, you can increase the durability.
- Decorative touches: Just like with the bookshelf, you can paint your side table, wrap it in fabric or paper, or add patterns and designs to match your home’s decor. You can even incorporate storage elements by adding small shelves or drawers to the side table.
- Storage Boxes and Organizers
If you’re looking for functional yet stylish storage solutions, recycled cardboard is perfect for creating custom storage boxes, bins, or organizers. These can be used to store everything from toys and office supplies to clothing and accessories.
- Custom sizes and shapes: One of the advantages of making your own storage boxes is that you can customize the size and shape to fit perfectly into any space, such as inside closets, under the bed, or on your newly built bookshelf.
- Stackable designs: For added functionality, design your boxes to be stackable. This will allow you to maximize storage space while keeping everything neatly organized.
- Decorative options: You can cover your boxes with colorful paper or fabric to match your room’s aesthetic. Add labels, handles, or dividers for easy access and organization.
- Modular Furniture Pieces
Modular furniture, which consists of individual components that can be rearranged or combined in different configurations, is another exciting option for a cardboard DIY project. Since cardboard is lightweight, it’s easy to move around and reconfigure to suit your needs.
- Modular shelving units: Create individual cardboard cubes or sections that can be stacked or arranged in various ways to form a larger shelving unit. This allows you to adapt the furniture to different spaces and purposes, such as a room divider, media console, or display case.
- Modular seating: Build small seating blocks or stools that can be stacked or rearranged to create chairs, benches, or ottomans. Reinforce the cardboard with extra layers or supports to ensure the seating is sturdy.
- Cardboard Wall Art and Decor
If you’re not in need of furniture but still want to work with recycled cardboard, you can easily turn it into beautiful wall art or home decor. Cardboard is an excellent medium for making custom decorations that add a personal touch to your living space.
- Geometric wall art: Cut the cardboard into different shapes, such as triangles, hexagons, or abstract forms, and arrange them on your wall to create a unique and modern art piece. You can paint or cover the shapes in different colors and textures to add visual interest.
- Picture frames: Use cardboard to make custom picture frames for your photos or artwork. You can design the frames in any size or shape, and decorate them with paint, fabric, or other materials for a personalized touch.
Conclusion
Building a DIY bookshelf from recycled cardboard is a fun, eco-friendly, and cost-effective project that allows you to create a functional piece of furniture while contributing to a sustainable lifestyle. With just a few basic tools and materials, you can craft a sturdy bookshelf customized to your exact needs and style preferences.
Recycled cardboard offers numerous benefits, from its affordability to its versatility in design. Whether you’re looking to furnish your home on a budget, reduce your environmental footprint, or simply explore your creative side, this project is a great way to accomplish all three. Moreover, once you’ve mastered the basics of working with cardboard, you can expand your DIY skills by trying out other creative projects, such as side tables, storage solutions, or wall art.
As you embark on your journey to create a cardboard bookshelf, remember to take your time, have fun, and experiment with different techniques and designs. By the end of the process, you’ll not only have a functional piece of furniture but also the satisfaction of knowing that you crafted it with your own hands using sustainable materials.
Knowing how to eliminate moisture that rises from the ground is not easy: today we will provide you with Read more

Discover how to care for an orchid with our expert guide, covering everything from proper lighting to disease prevention. Read more

If you have run out of ideas, but you want to know how to decorate a Christmas tree with tinsel, Read more
If you are interested in learning how to safely install anti-humidity plates on your own, saving time and money, don't Read more
FAQ Section
- How strong is a cardboard bookshelf? A well-constructed cardboard bookshelf can hold a surprising amount of weight, especially if reinforced with multiple layers and supports. Double-wall corrugated cardboard is strong enough to hold books and decor items if properly assembled.
- Can I make the bookshelf waterproof? Yes, you can apply a waterproof sealant or use moisture-resistant paint to protect your cardboard bookshelf from water damage. Just make sure to use eco-friendly, non-toxic products to keep with the sustainability theme.
- Where can I find recycled cardboard? You can source recycled cardboard from shipping boxes, old packaging, or local stores. Many businesses are happy to give away large boxes, especially from bulk deliveries.
- What other furniture can I make with recycled cardboard? Aside from bookshelves, you can make side tables, storage boxes, modular seating, and even decorative items like wall art or picture frames using recycled cardboard.


